> ## Documentation Index
> Fetch the complete documentation index at: https://chatbase.co/docs/llms.txt
> Use this file to discover all available pages before exploring further.
# Custom Action
> Call your own API, run code in the browser, or show an interactive widget, all from inside the conversation
## Overview
Custom Actions let you connect your AI agent to anything you can reach over an API. The AI agent calls your endpoint, gets the response back, and uses that data in its reply, so it can answer questions and perform tasks that live entirely in your own systems. Custom Actions can also run code in the customer's browser or display an interactive widget in the chat.
Anything Chatbase doesn't have a built-in action for: looking up records in your own database, triggering a workflow, or showing a custom UI in the chat.
**Common Use Cases:**
* "Upgrade my subscription to premium"
* "What's the weather in London?"
* "Look up my account balance"
## Action Types
When creating a custom action, you select a **type** that determines how the action behaves:
| Type | What it does |
| --------------------------- | -------------------------------------------------------------------------------------------------------------------------------------------------------------------------------------------------------------------------- |
| **Server** | Calls an external API and returns the response to the AI agent. The AI agent uses the response data in its reply. |
| **Server with UI (Widget)** | Calls an external API, then displays a [widget](/docs/developer-guides/widgets/overview) inline in the chat with the response data. Use this to show rich, interactive UI after fetching data. |
| **Client** | Executes code in the customer's browser via the [JavaScript embed script](/docs/developer-guides/client-side-custom-actions). Useful for accessing browser APIs and frontend context. |
| **Widget only (UI only)** | Displays a [widget](/docs/developer-guides/widgets/overview) inline in the chat without calling an API. The AI agent populates the widget from the conversation context. Use this for forms, info cards, and interactive menus. |
**Server with UI** and **Widget only** actions let you attach a widget to the action. You can create and manage widgets directly from the action's configuration page. See the [Widgets documentation](/docs/developer-guides/widgets/overview) for details on building widgets.
## How to create the action
Go to your [Chatbase dashboard](https://www.chatbase.co/dashboard/) and select your AI agent. Click **Build > Actions** in the left sidebar.
Click **Create action**, then select **Custom Action** and the [type](#action-types) you need.
See [General](#general) below, then click **Save and continue**.
Define the data inputs the AI agent collects and the request it sends. See [API](#api) below, then click **Save and continue**.
Verify the endpoint returns what you expect. See [Test Response](#test-response) below, then click **Save and continue**.
Choose how much of the response the AI agent can see. See [Data Access](#data-access) below, then click **Save and continue**.
Use **Channels** to control where the action is available. Toggle the action on or off for each configured channel, then click **Save**. Some channels may be incompatible with the action and won't be available for selection.
Ensure the action is toggled to **Enabled**, then test it in the Playground.
## General
**Action Name:** A descriptive name for this action. This helps the AI agent know when to use it.
**When to use:** A detailed description explaining when the AI agent should use this action and API. Include examples of the data this action provides and the customer queries it helps answer.
To restrict the action to [procedure](/docs/user-guides/chatbot/procedures/procedures-overview) steps only, turn on [**Only use in procedures**](/docs/user-guides/chatbot/actions/actions-overview#only-use-in-procedures). When it's on, the **When to use** field is hidden, because the AI agent no longer decides when to call the action.
All custom action requests must send a **JSON body**, and all custom action responses must be **JSON-formatted**.
## API
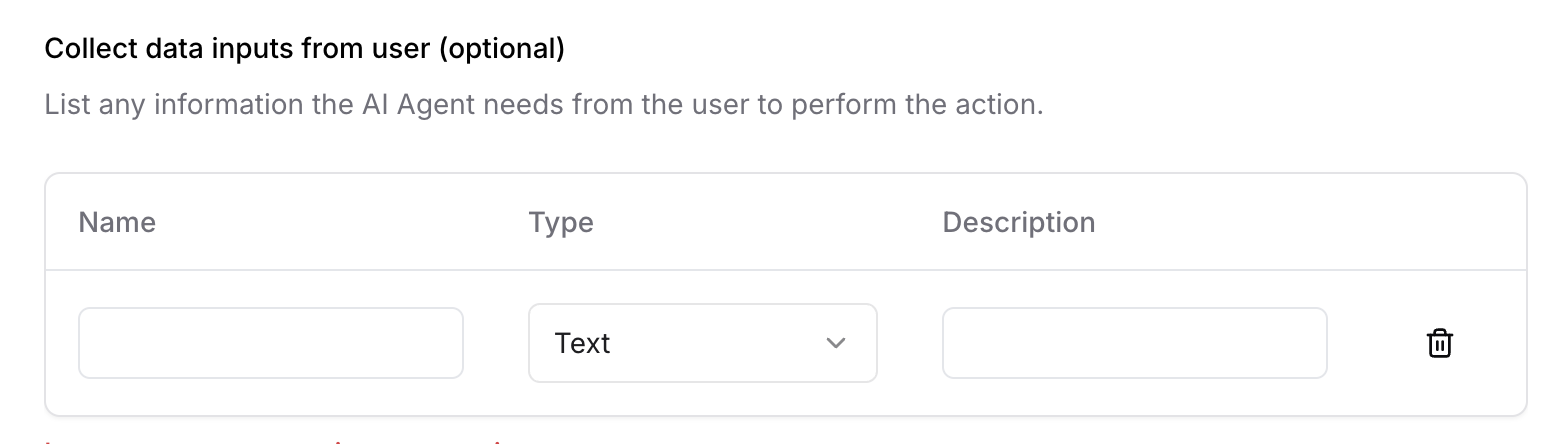
### Collect data inputs from user
The list of information the AI agent needs from the customer to perform the action. Each input has:
* **Name:** Name of the data input.
* **Type:** Type of the data input.
* **Description:** A short sentence describing the data input to the AI agent, so it knows what to ask for.
 ### API request
The endpoint the AI agent calls to retrieve data or send updates. You can include data inputs collected from the customer in the URL or the request body.
* **Method:** The HTTP method the request should use.
* **HTTPS URL:** The URL of the API the AI agent should call.
* **Add variable:** Inserts a variable that depends on the customer's input.
### API request
The endpoint the AI agent calls to retrieve data or send updates. You can include data inputs collected from the customer in the URL or the request body.
* **Method:** The HTTP method the request should use.
* **HTTPS URL:** The URL of the API the AI agent should call.
* **Add variable:** Inserts a variable that depends on the customer's input.
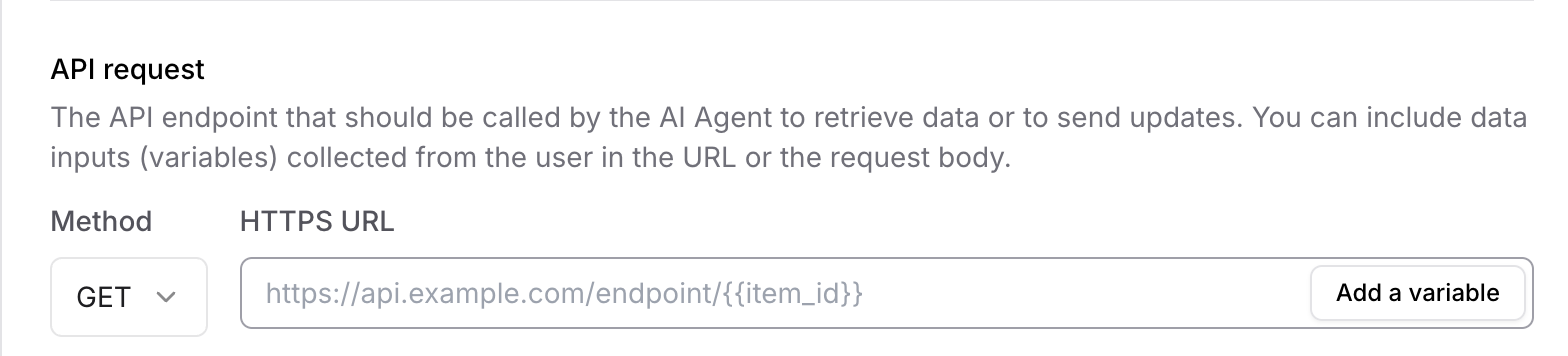 When the URL is added, the parameters, headers, and body are populated automatically:
* **Parameters:** Key-value pairs sent as part of the request URL to provide input data or filter the response.
* **Headers:** Metadata sent along with the request to describe the request or client.
* **Body:** The data sent as part of the request. The body must be **JSON-formatted**.
## Test Response
* **Live response:** Test with live data from the API to make sure it's configured correctly.
* **Example response:** Use example JSON data if the API isn't ready yet.
## Data Access
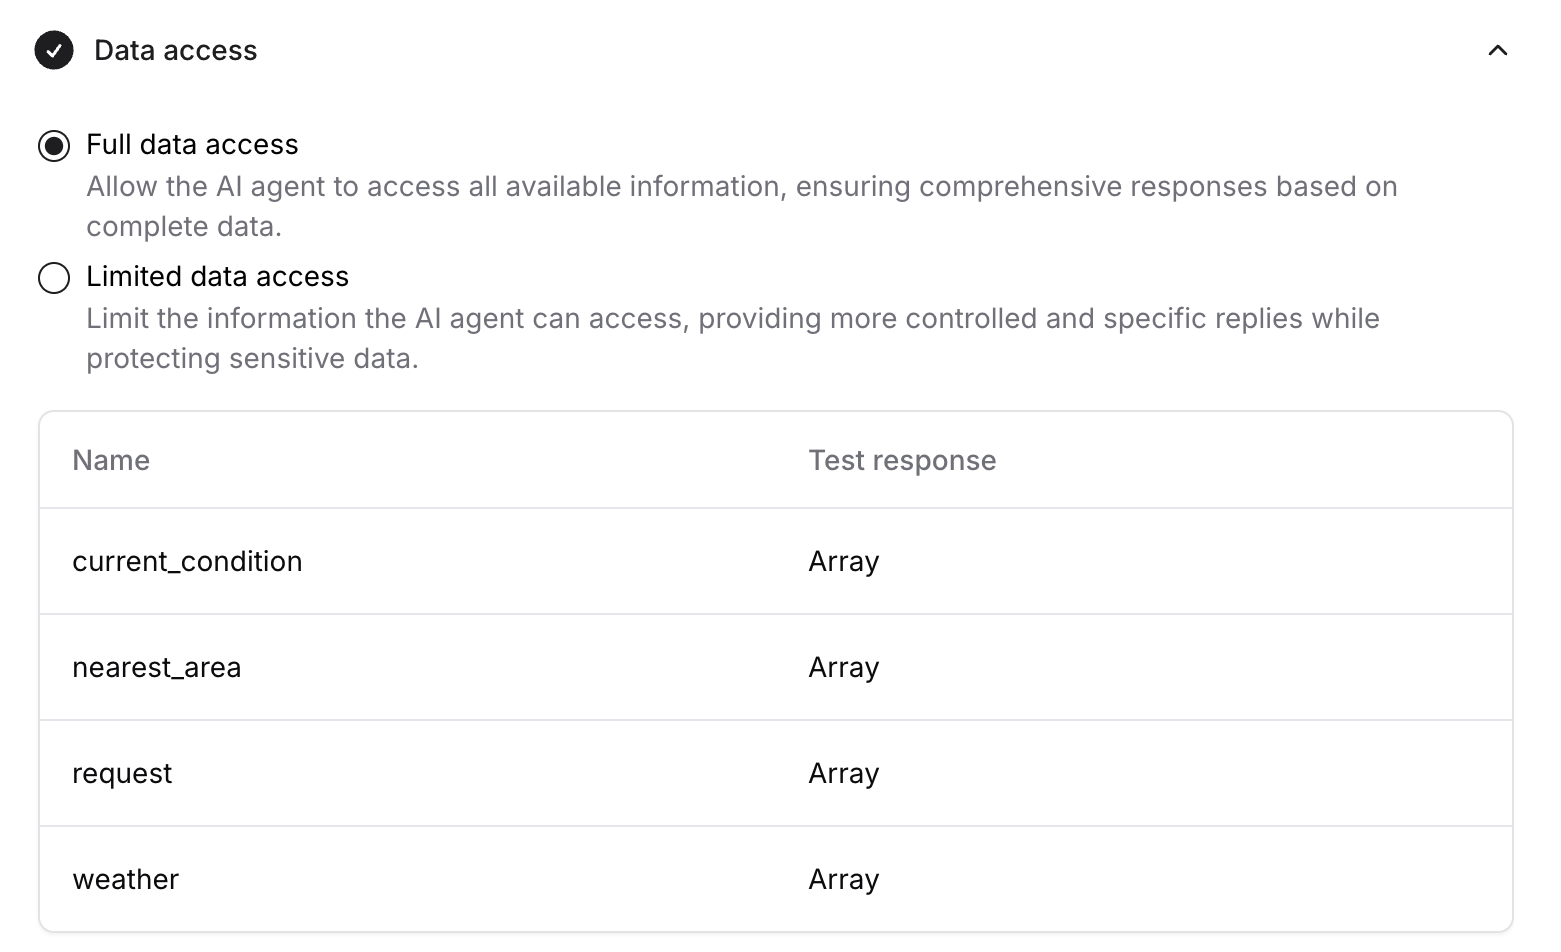
* **Full data access:** The AI agent can access all available information from the API's response, giving comprehensive replies based on complete data.
* **Limited data access:** Restricts the information the AI agent can access, giving more controlled and specific replies while protecting sensitive data.
Test the action in the Playground with a query that should trigger it, and confirm the AI agent calls your endpoint and uses the response in its reply.
## Examples
### Upgrade subscription
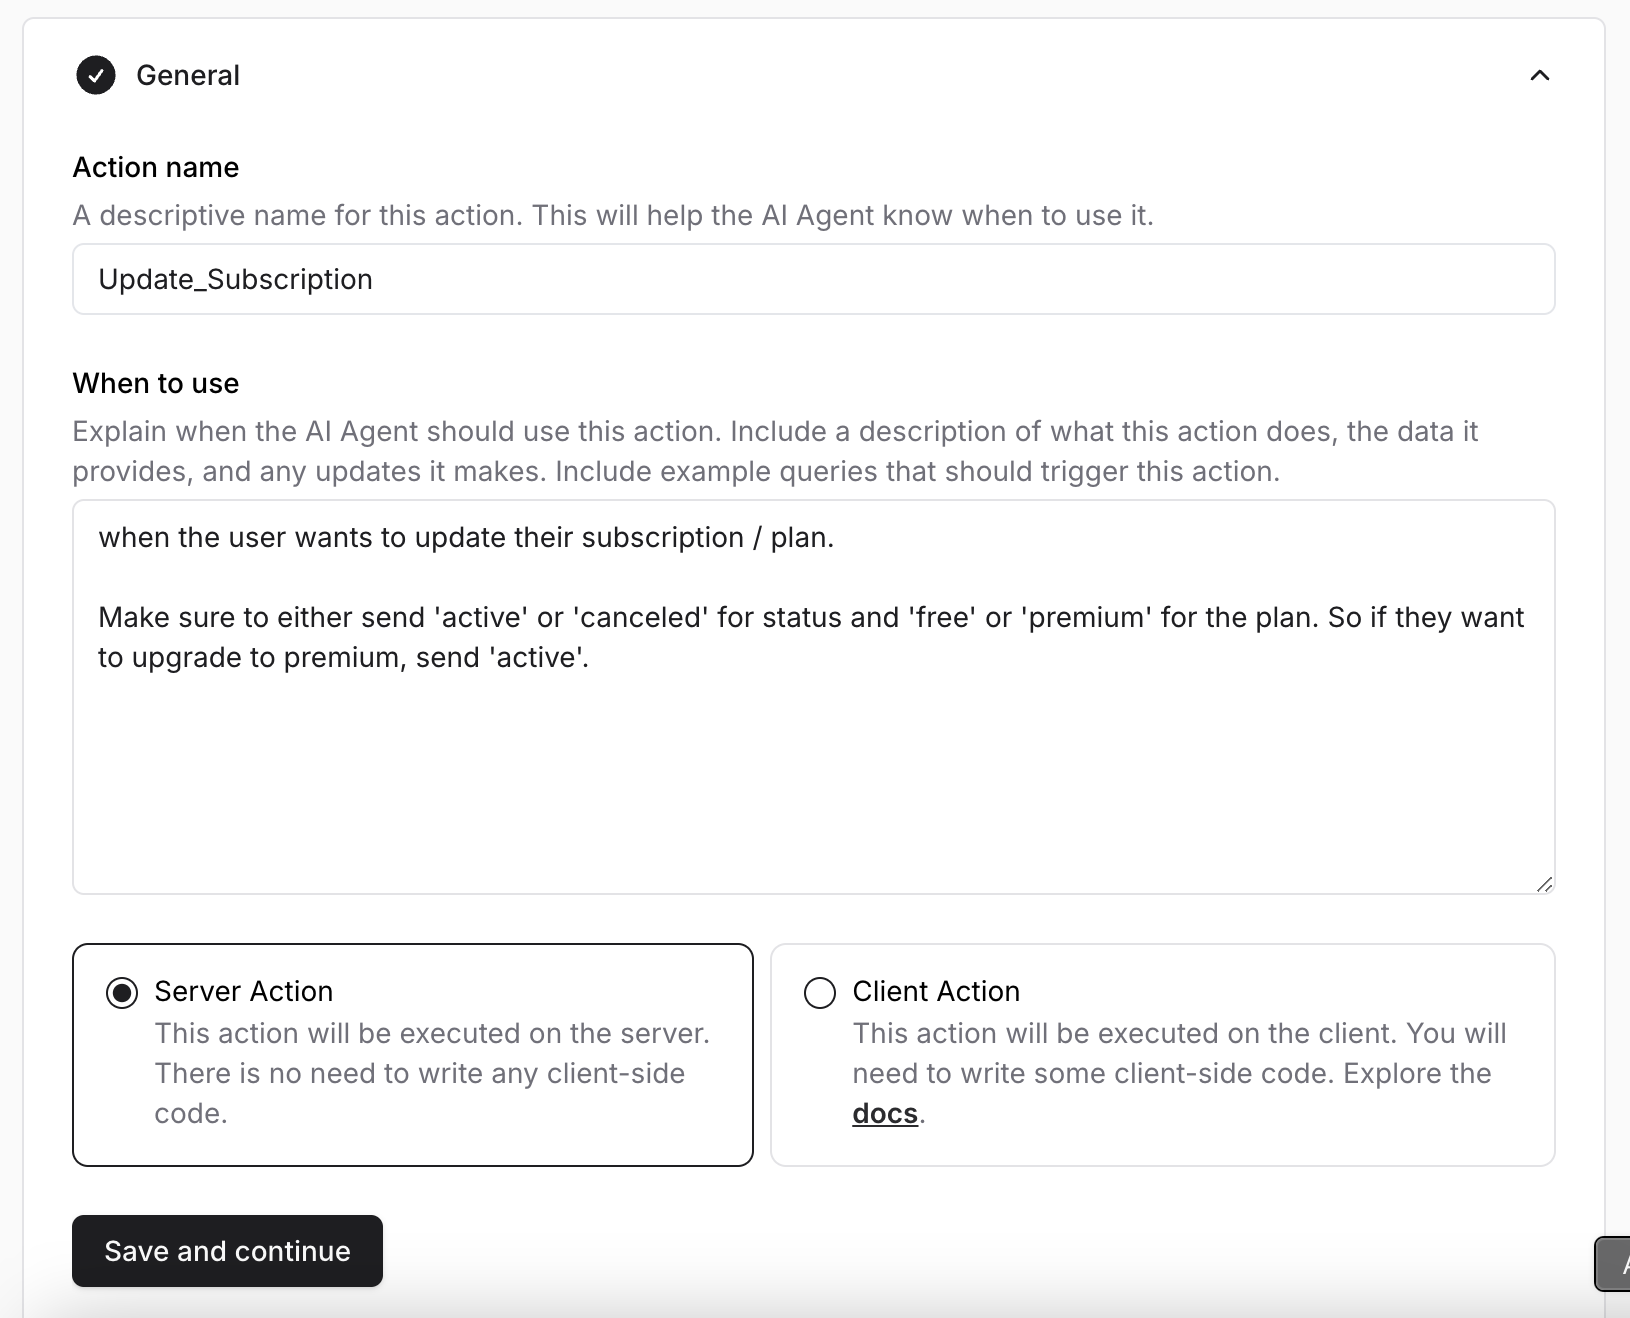
An `Update_Subscription` action that lets the customer ask the AI agent to upgrade their subscription to the premium plan.
In the **General** section, the action is named `Update_Subscription`, with a **When to use** description telling the AI agent to call this API whenever the customer wants to upgrade.
When the URL is added, the parameters, headers, and body are populated automatically:
* **Parameters:** Key-value pairs sent as part of the request URL to provide input data or filter the response.
* **Headers:** Metadata sent along with the request to describe the request or client.
* **Body:** The data sent as part of the request. The body must be **JSON-formatted**.
## Test Response
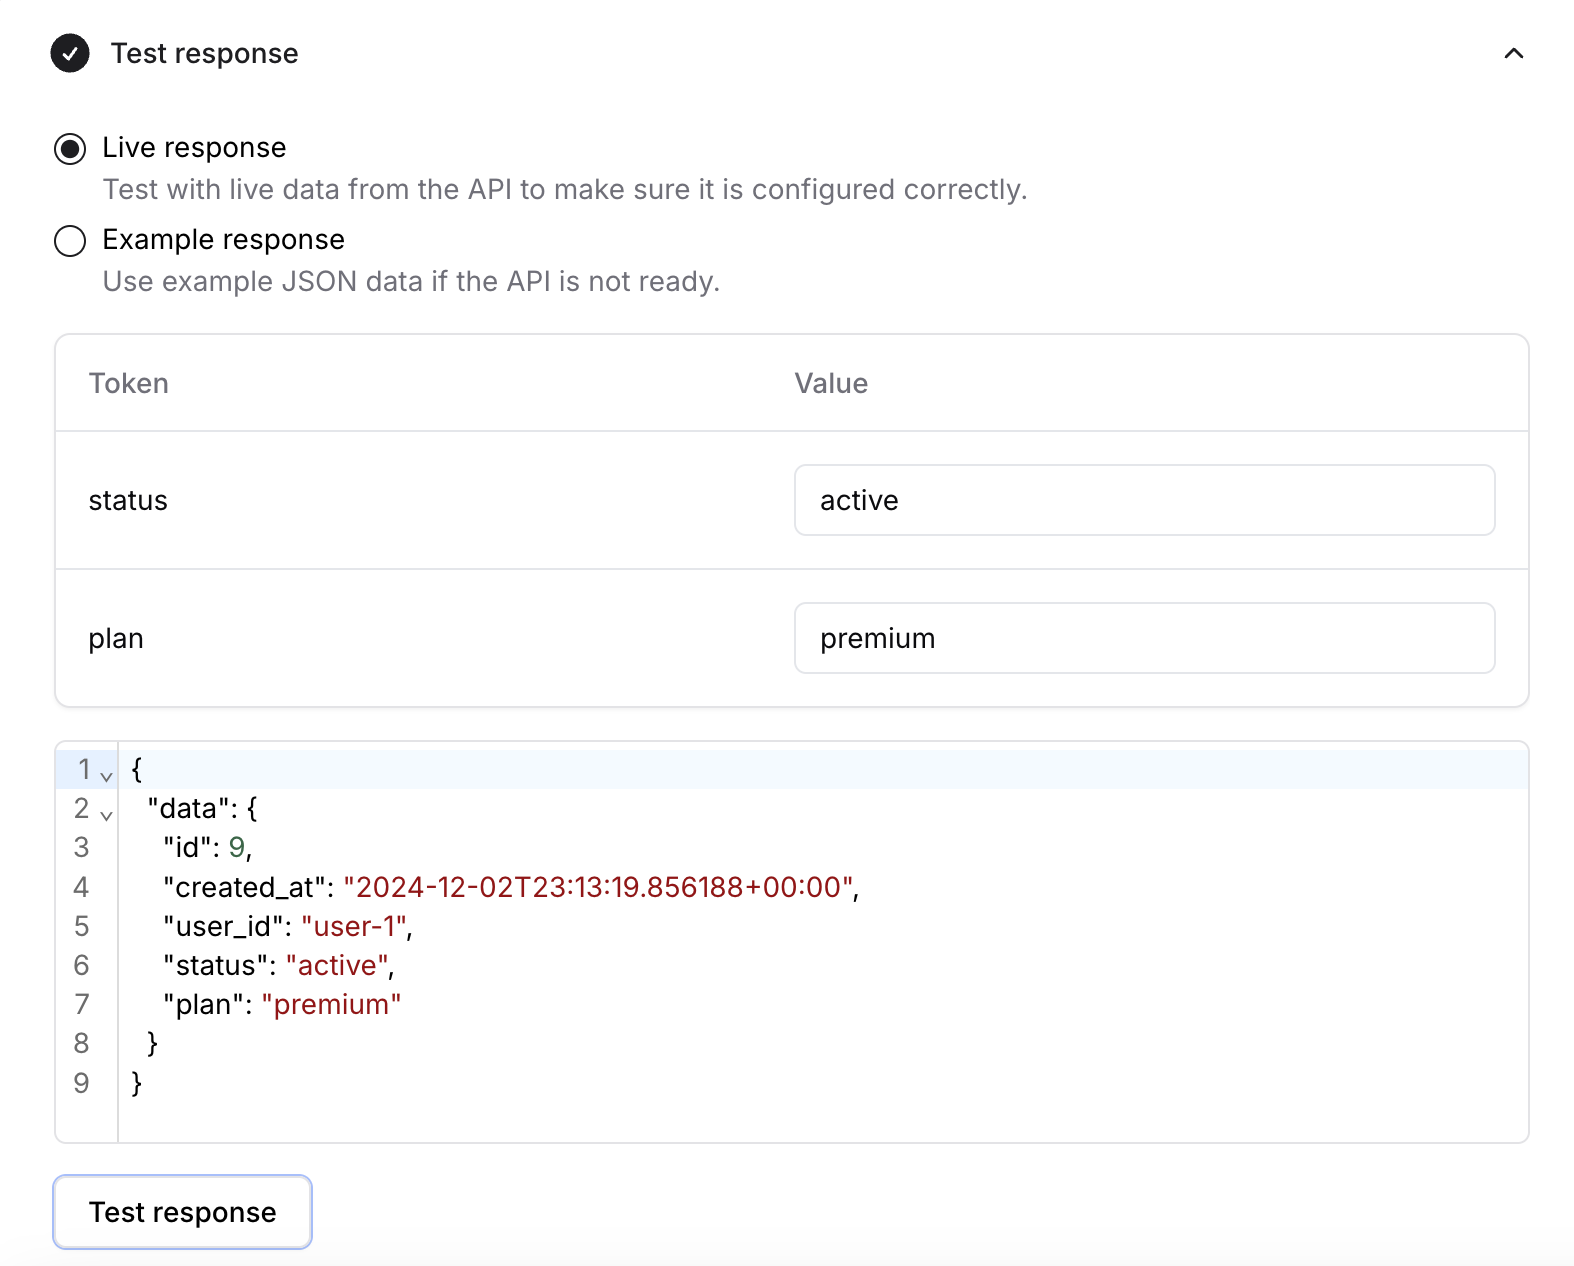
* **Live response:** Test with live data from the API to make sure it's configured correctly.
* **Example response:** Use example JSON data if the API isn't ready yet.
## Data Access
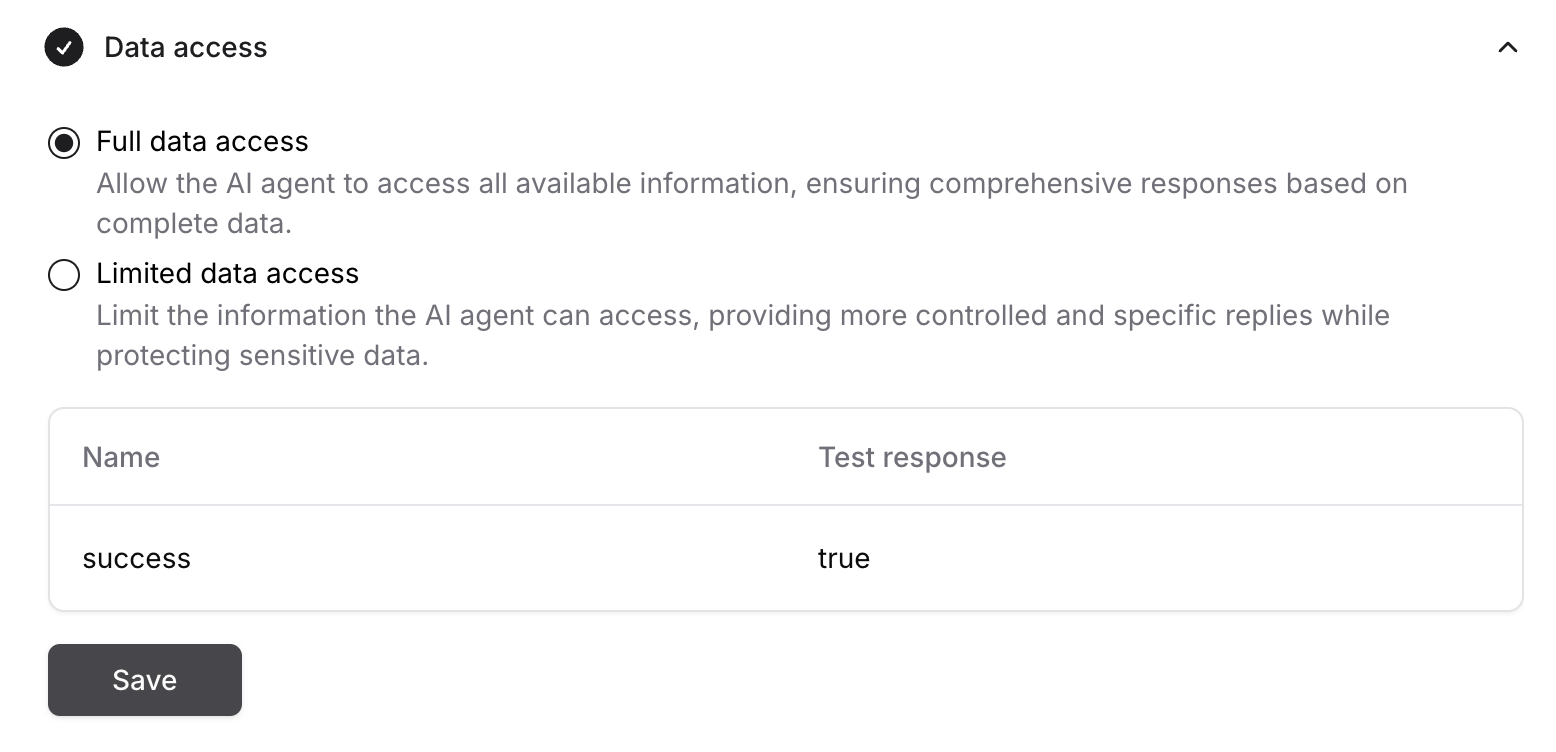
* **Full data access:** The AI agent can access all available information from the API's response, giving comprehensive replies based on complete data.
* **Limited data access:** Restricts the information the AI agent can access, giving more controlled and specific replies while protecting sensitive data.
Test the action in the Playground with a query that should trigger it, and confirm the AI agent calls your endpoint and uses the response in its reply.
## Examples
### Upgrade subscription
An `Update_Subscription` action that lets the customer ask the AI agent to upgrade their subscription to the premium plan.
In the **General** section, the action is named `Update_Subscription`, with a **When to use** description telling the AI agent to call this API whenever the customer wants to upgrade.
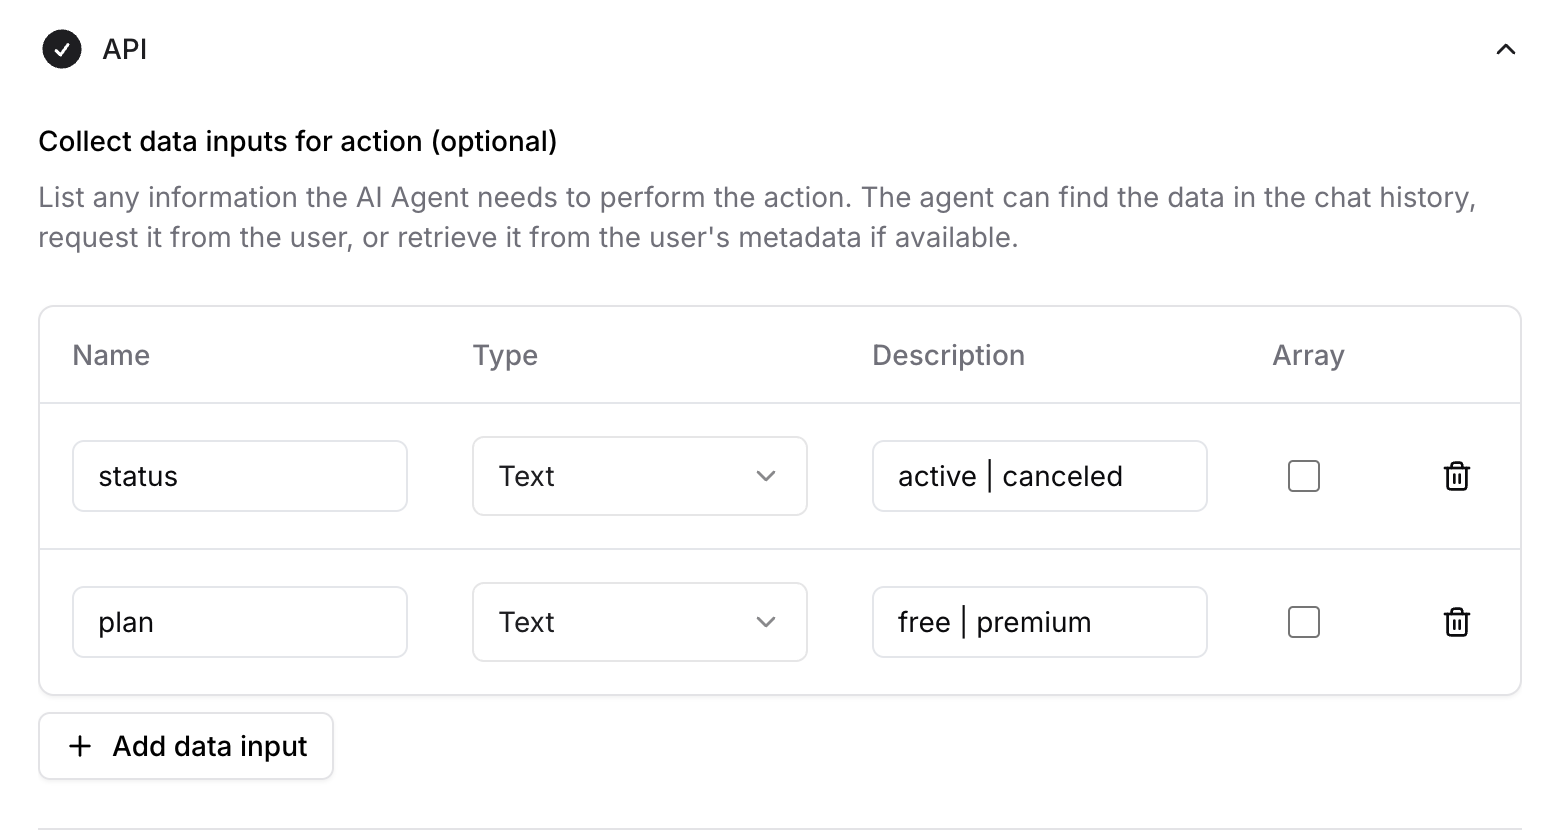
 In the **API** section, the data inputs are the status of the plan and the new plan requested, described as: *Active or canceled. If they want to upgrade to premium, send 'active'*.
 In the **API request** section, the URL is `https://demo-rhythmbox.chatbase.fyi/api/update-subscription` with the method set to `GET`.
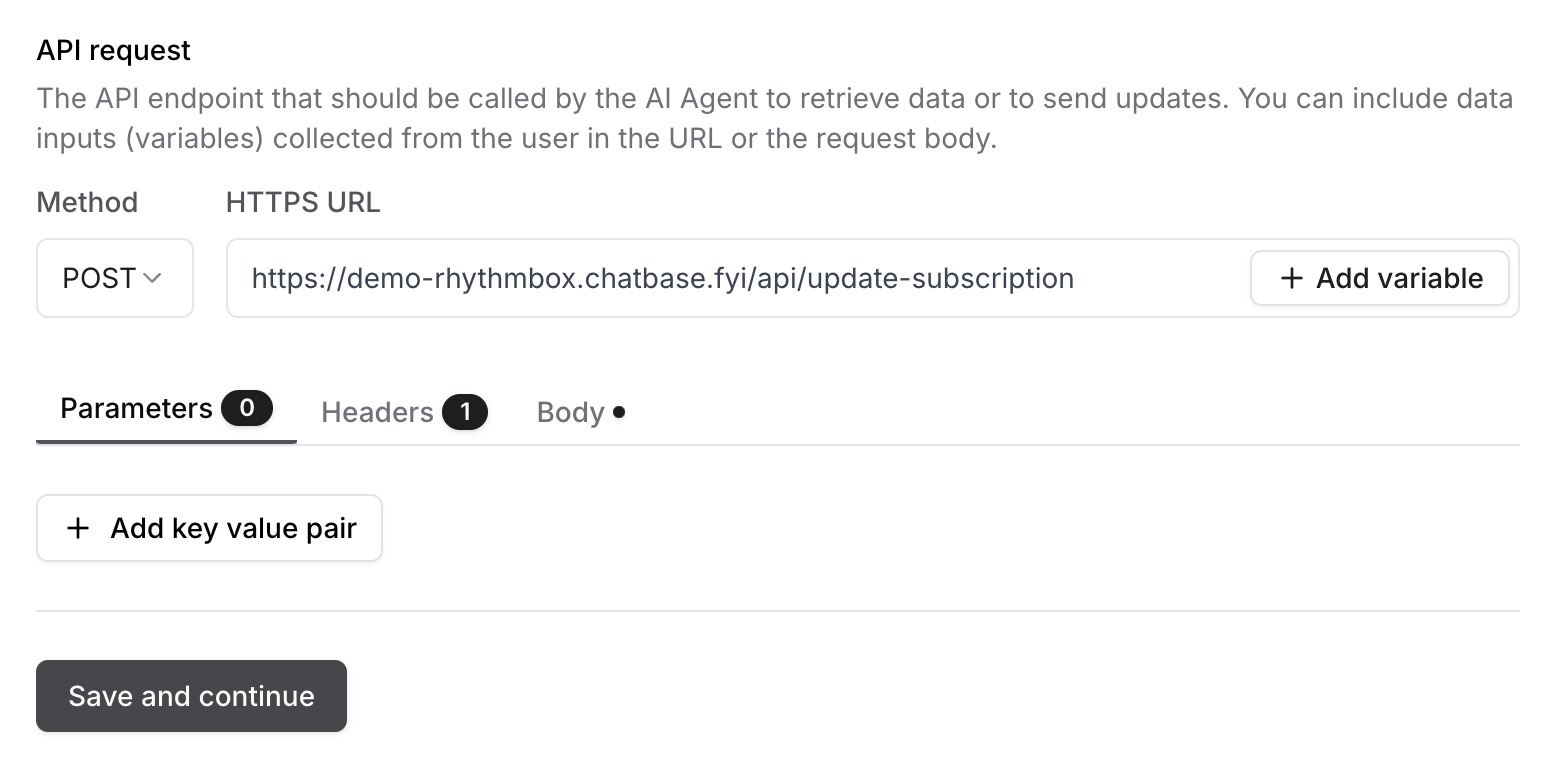 In **Test Response**, the endpoint is tested with `active` and `premium` as the upgrade example.
 In **Data Access**, **Full data access** is selected so the AI agent can use all the information from the response.
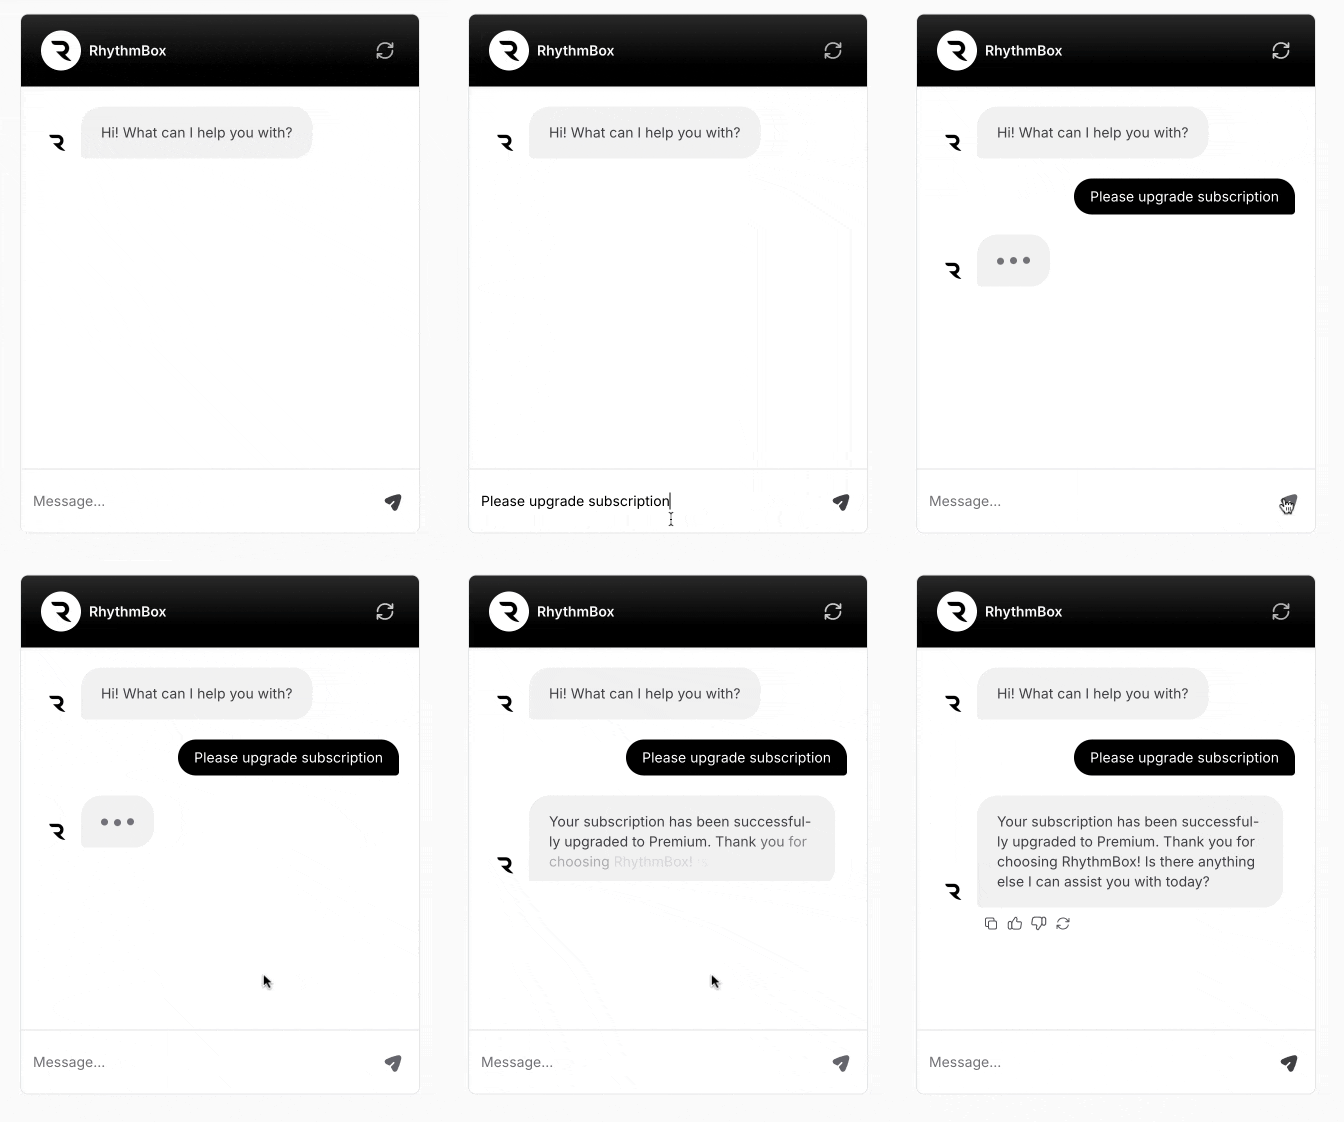
 The AI agent can now upgrade or downgrade the subscription when the customer asks.
 ### Weather API
A `Get_Weather` action that provides weather information for any city the customer asks about.
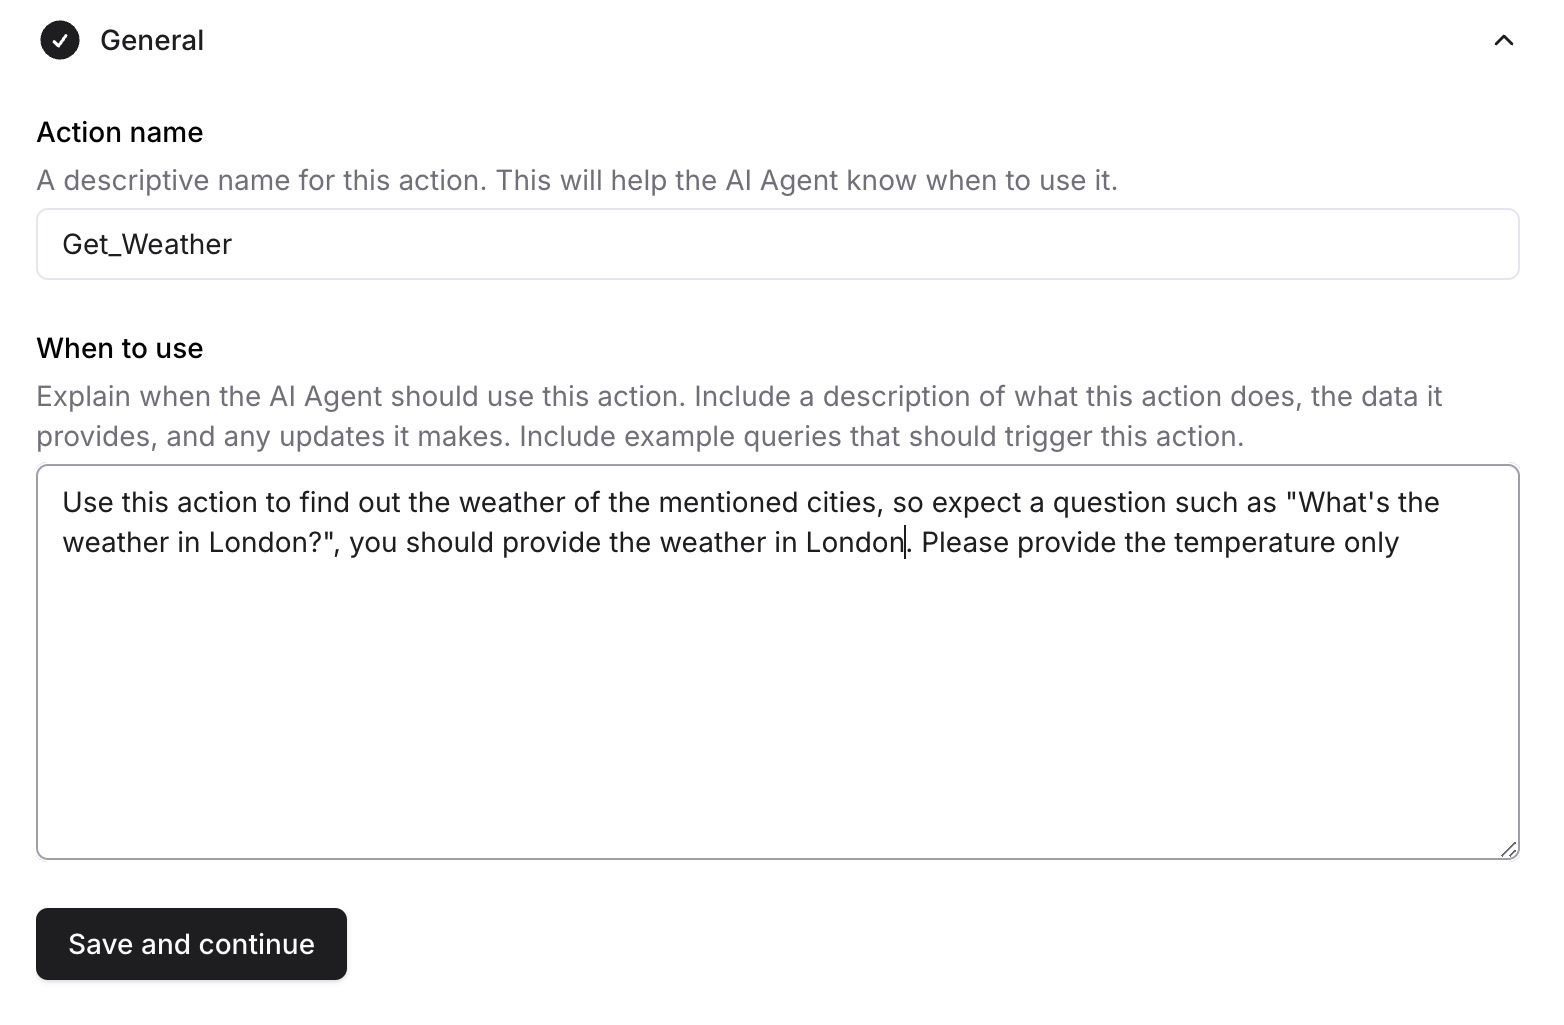
In the **General** section, the action is named `Get_Weather`, with a **When to use** description telling the AI agent to use this API whenever it's asked about the weather of any city.
### Weather API
A `Get_Weather` action that provides weather information for any city the customer asks about.
In the **General** section, the action is named `Get_Weather`, with a **When to use** description telling the AI agent to use this API whenever it's asked about the weather of any city.
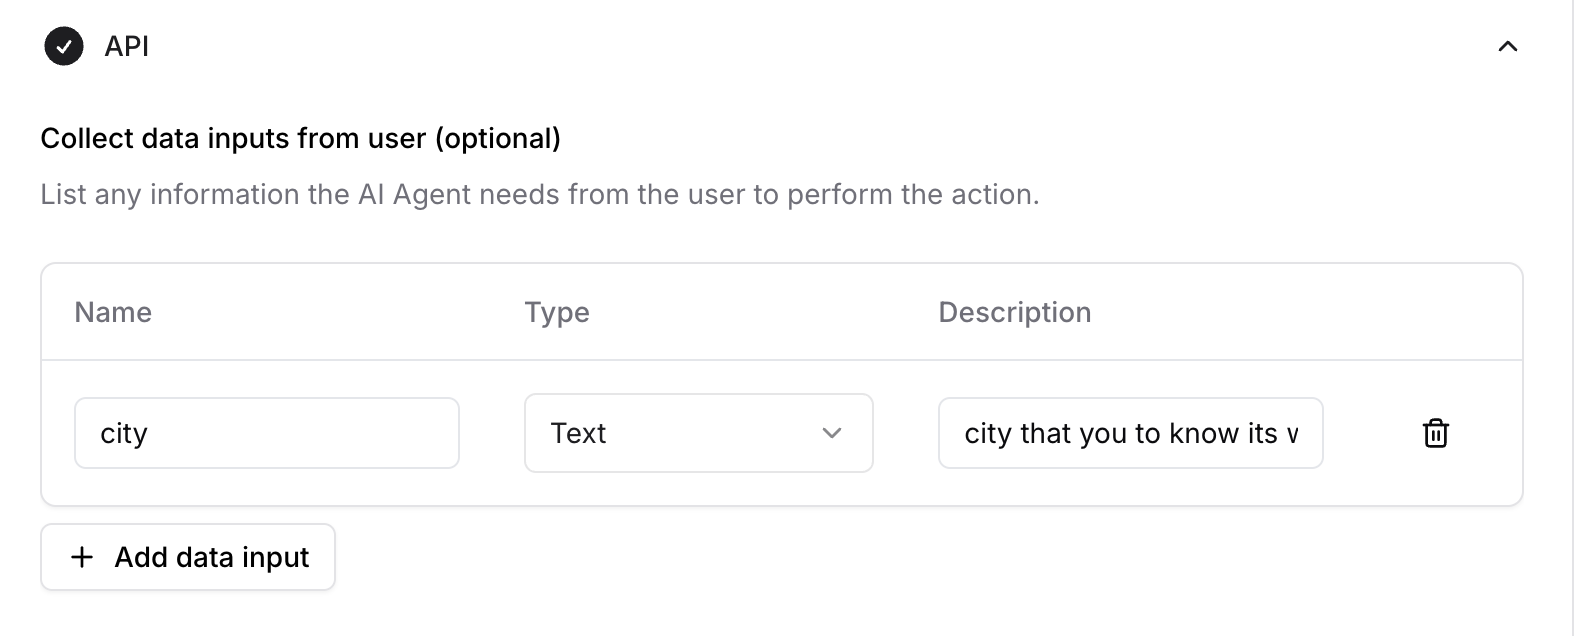
 In the **API** section, the input is named `City`, with the type `Text` and the description: *The city that you want to know its weather*.
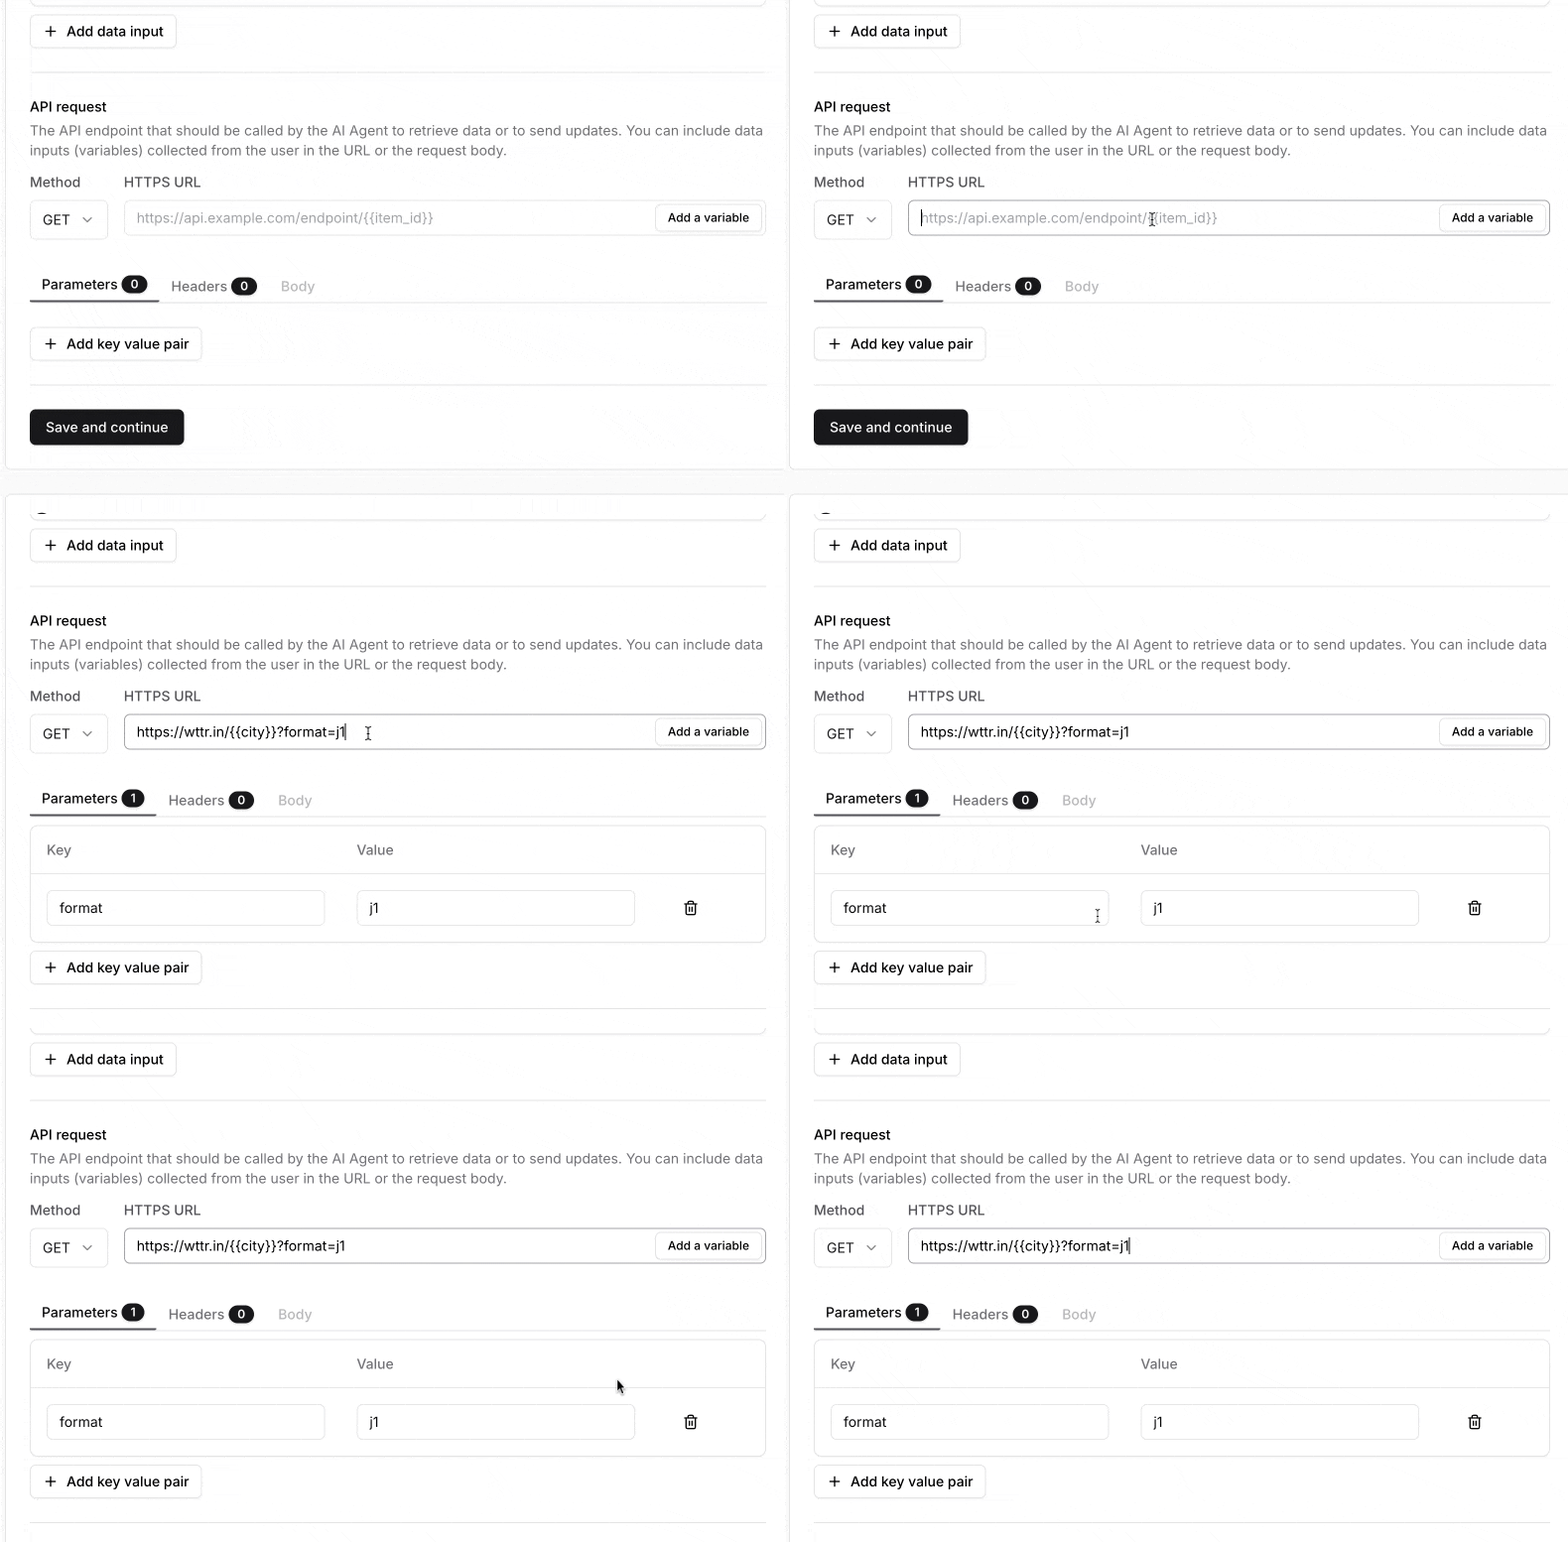
 In the **API request** section, the URL is `https://wttr.in/{{city}}?format=j1` with the method set to `GET`. The key-value pair in the parameters is added automatically after entering the URL.
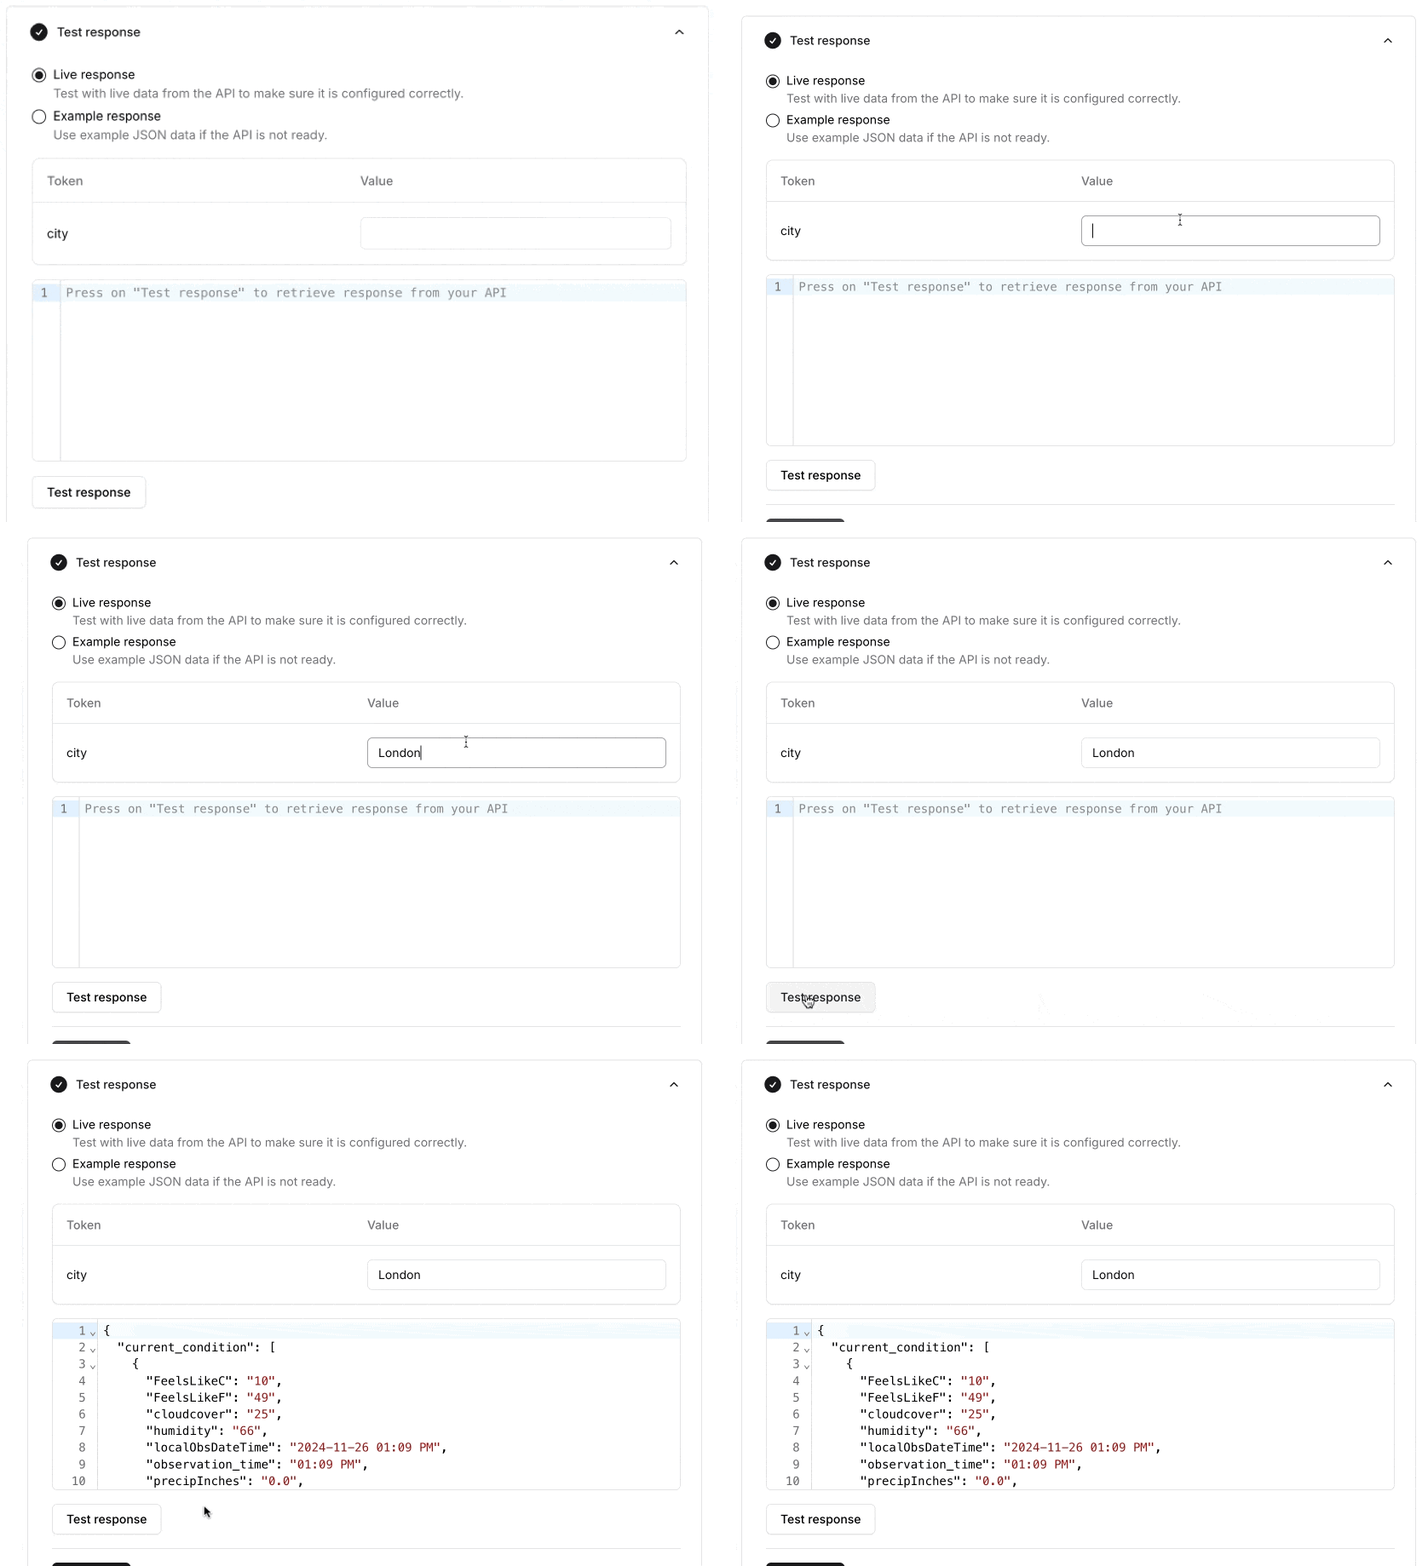
 In **Test Response**, the endpoint is tested with `London` as the city.
 In **Data Access**, **Full data access** is selected so the AI agent can use all the information from the response.
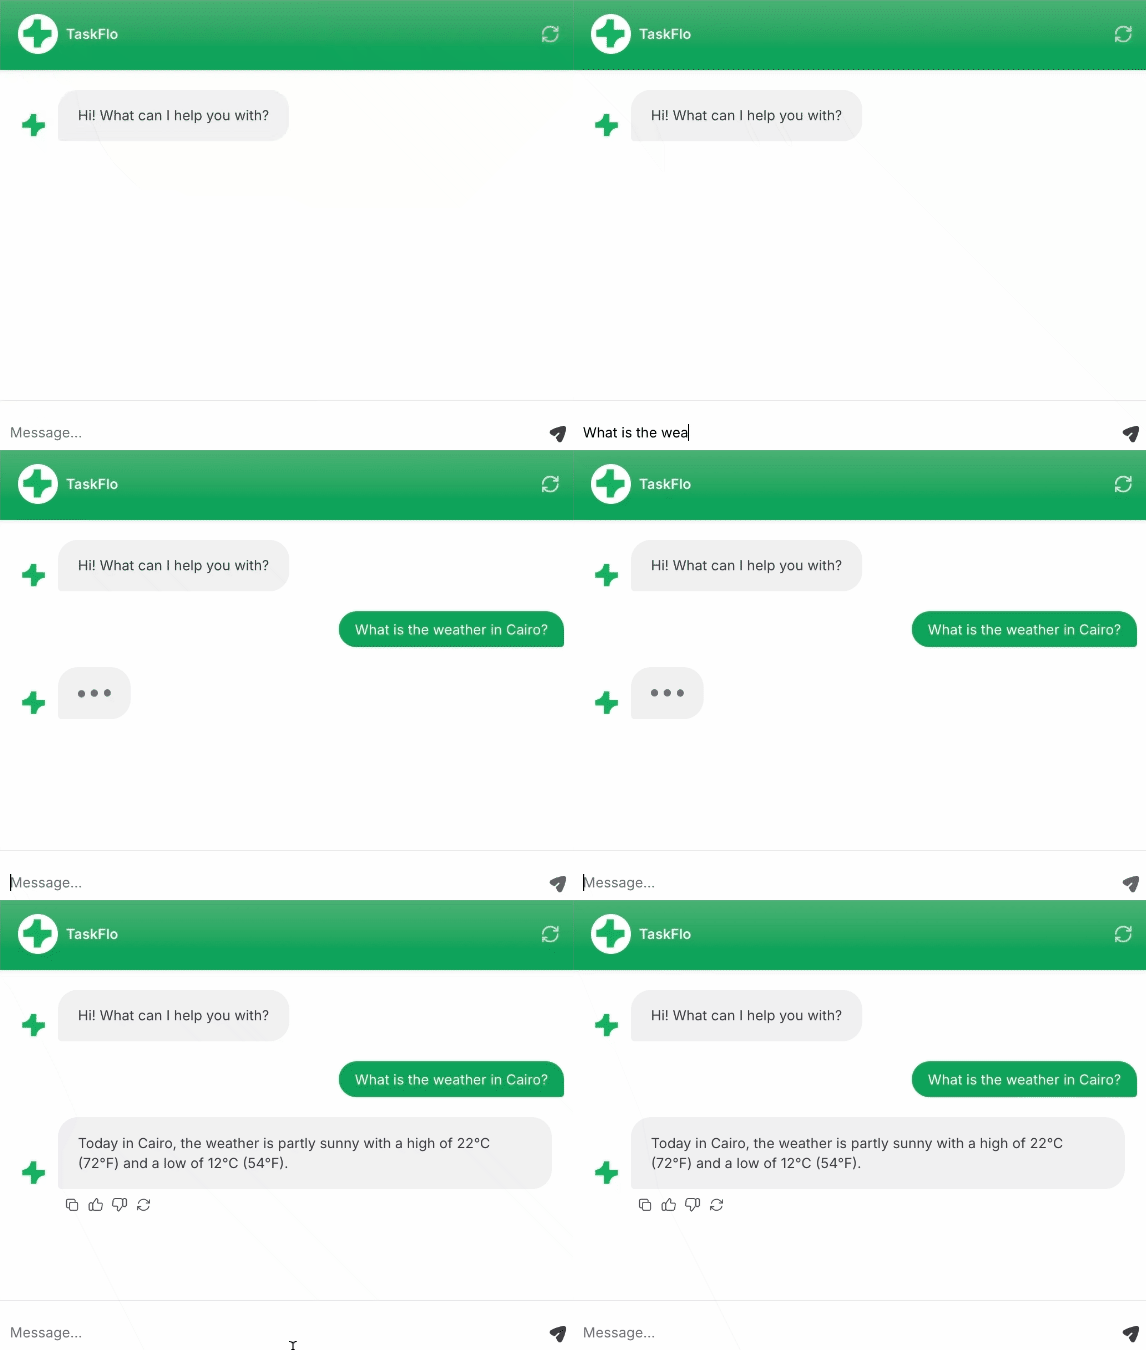
 The AI agent can now answer the weather for any city the customer asks about.
 ## Limitations
* **The maximum response size is 20KB.** Anything larger returns an error.
* **Requests and responses must be JSON.** The request body must be JSON-formatted, and the returned response must be JSON-formatted.
* **Client actions need the JavaScript embed.** The **Client** type executes in the customer's browser through the [embed script](/docs/developer-guides/client-side-custom-actions), so it won't run on channels that don't load it.
## Best Practices
Write a specific **When to use** description that names the data this action provides and the customer queries it answers.
The input description is what the AI agent uses to decide what to ask the customer for. Vague descriptions produce wrong values.
Use **Limited data access** when the response contains anything the AI agent shouldn't repeat back to the customer.
Return only the fields the AI agent needs. Trimming the response keeps you under the 20KB cap and makes replies more accurate.
## Limitations
* **The maximum response size is 20KB.** Anything larger returns an error.
* **Requests and responses must be JSON.** The request body must be JSON-formatted, and the returned response must be JSON-formatted.
* **Client actions need the JavaScript embed.** The **Client** type executes in the customer's browser through the [embed script](/docs/developer-guides/client-side-custom-actions), so it won't run on channels that don't load it.
## Best Practices
Write a specific **When to use** description that names the data this action provides and the customer queries it answers.
The input description is what the AI agent uses to decide what to ask the customer for. Vague descriptions produce wrong values.
Use **Limited data access** when the response contains anything the AI agent shouldn't repeat back to the customer.
Return only the fields the AI agent needs. Trimming the response keeps you under the 20KB cap and makes replies more accurate.