> ## Documentation Index
> Fetch the complete documentation index at: https://chatbase.co/docs/llms.txt
> Use this file to discover all available pages before exploring further.
# Stripe
> Connect Stripe so your AI agent can securely show customers their subscriptions, invoices, and billing details
## Overview
Integrating Stripe with Chatbase lets your AI agent access and display key billing information directly to customers. The AI agent can securely retrieve and show subscriptions and invoice history, which streamlines common billing inquiries and gives customers a clear view of their payment status, all within the chat.
Answer "what am I paying?", "when does it renew?", and "was my payment processed?" instantly, from live Stripe data, without a human touching the ticket.
## Before you start
* A Chatbase account with an AI agent. If you haven't built one yet, [create a free Chatbase account](https://www.chatbase.co/auth/signup) and follow [Your first AI agent](/docs/user-guides/quick-start/your-first-agent).
* A Stripe account you can authorize, or a restricted API key from it.
## Connection methods
| Method | When to use it |
| -------------------------------------------------------------------------------- | ----------------------------------------------------------------- |
| [Install the Stripe app](#method-1-install-the-stripe-app) | The recommended option for most stores |
| [Connect with a restricted API key](#method-2-connect-with-a-restricted-api-key) | When you want granular control over the permissions Chatbase gets |
## Method 1: Install the Stripe app
1. Head to your [dashboard](https://www.chatbase.co/dashboard/) and click the AI agent you wish to integrate with Stripe.
2. Click **Integrations** in the left sidebar.
3. Click **Connect** under the Stripe card.
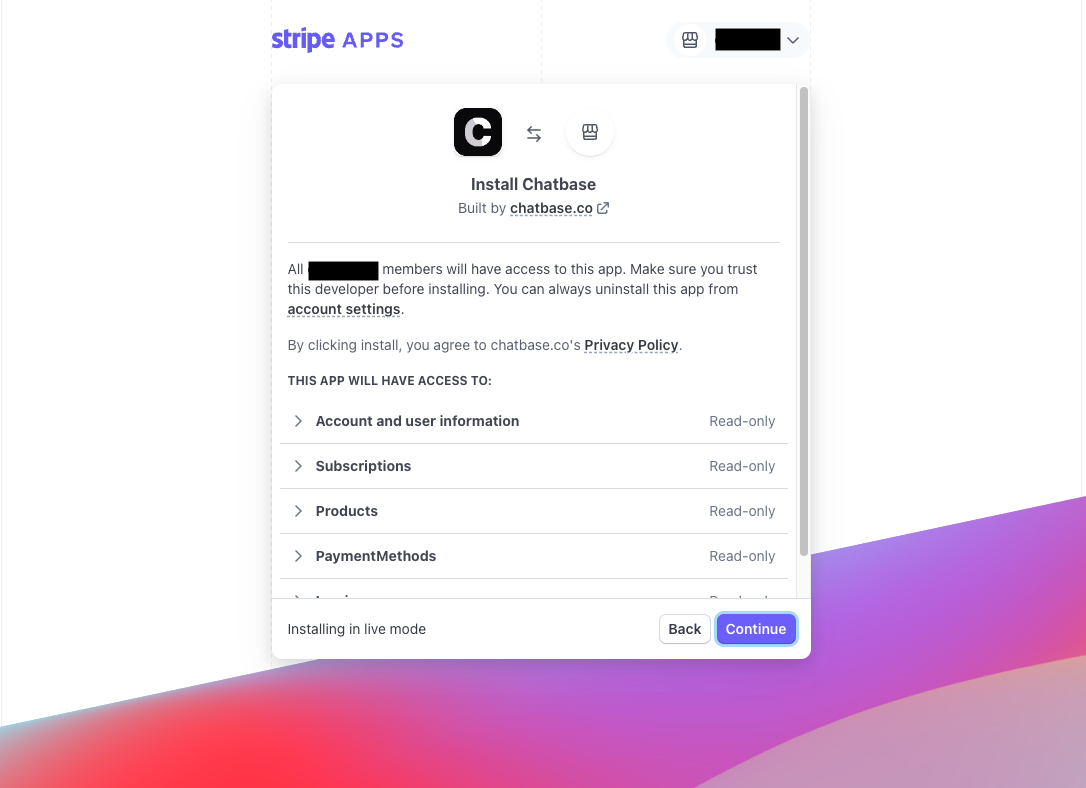
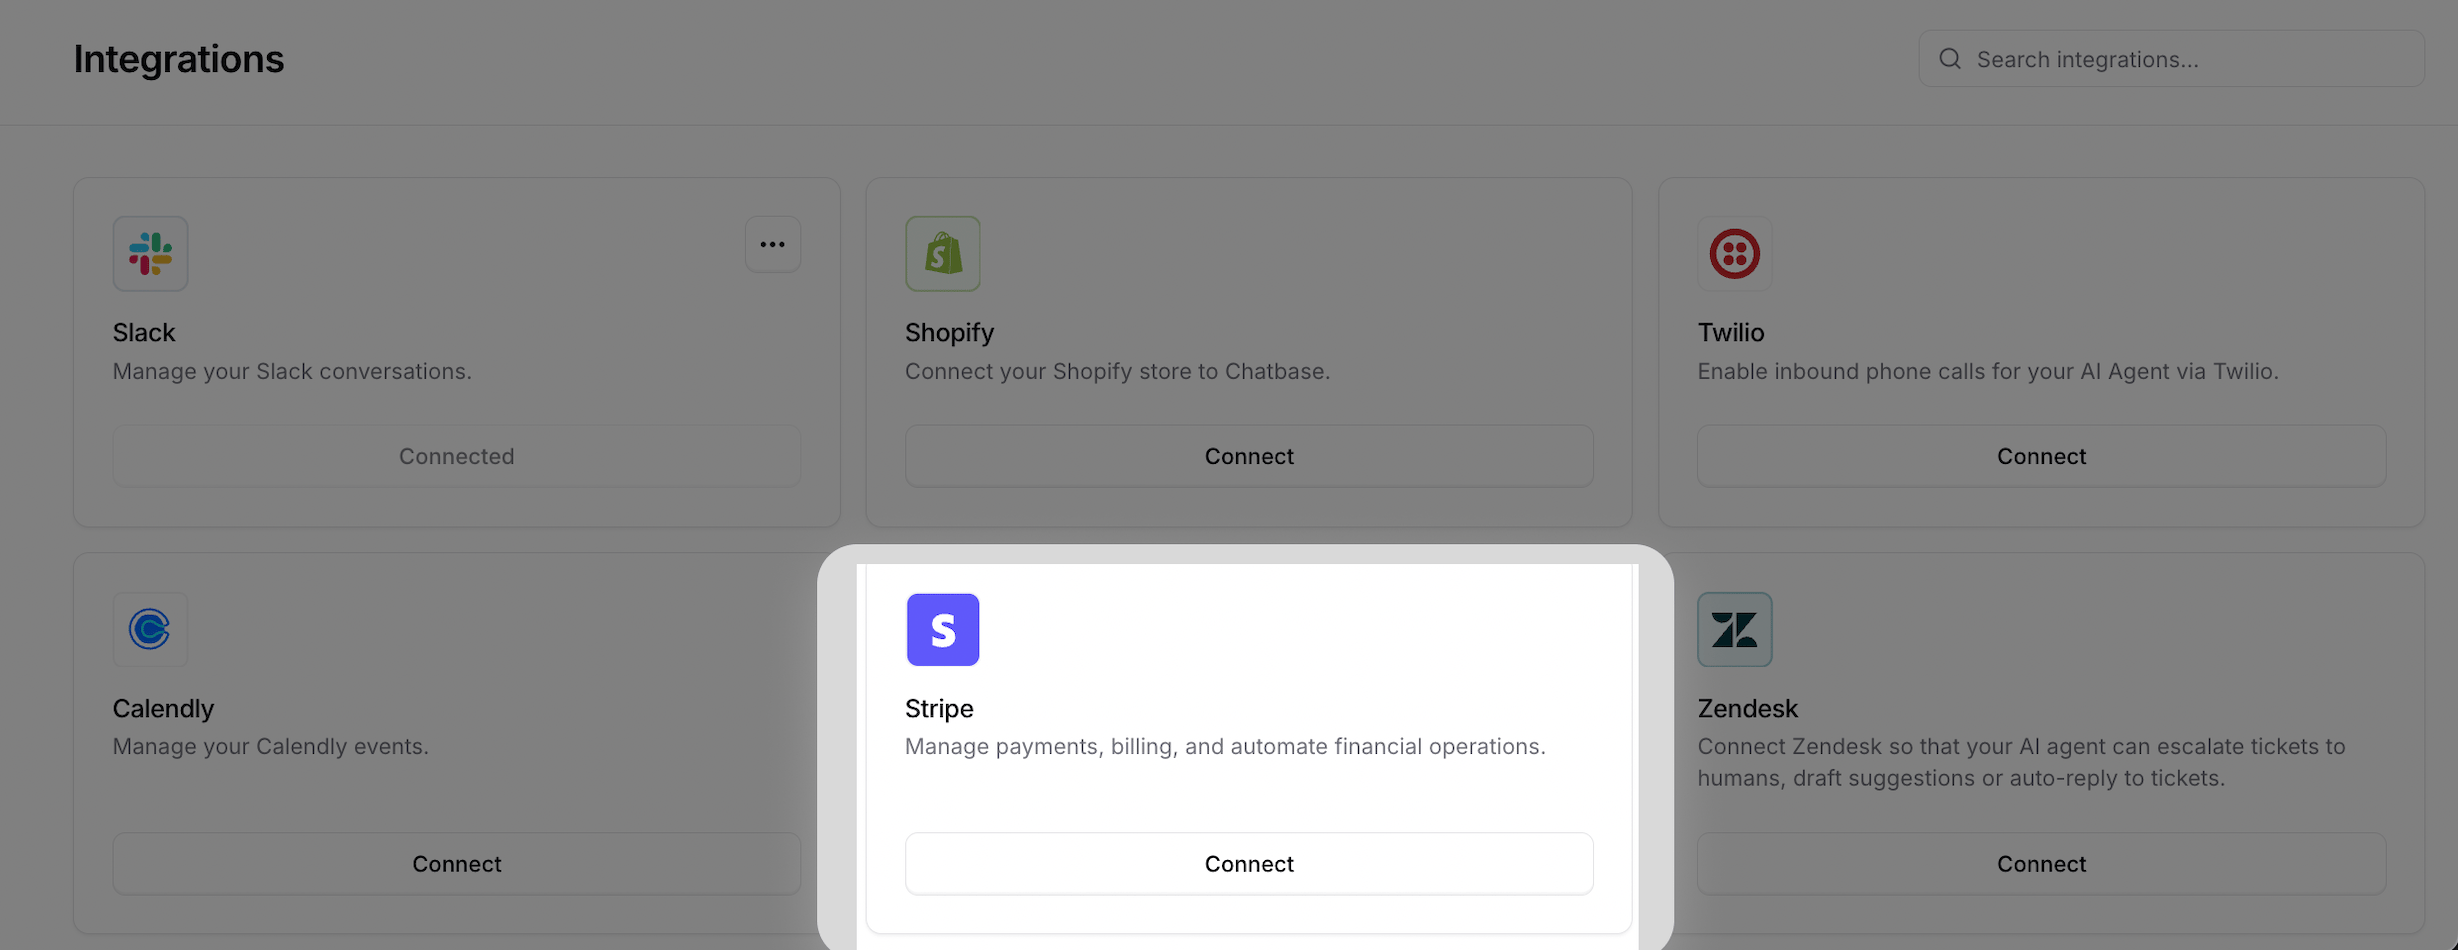 You'll be asked to authorize Chatbase to access your Stripe account.
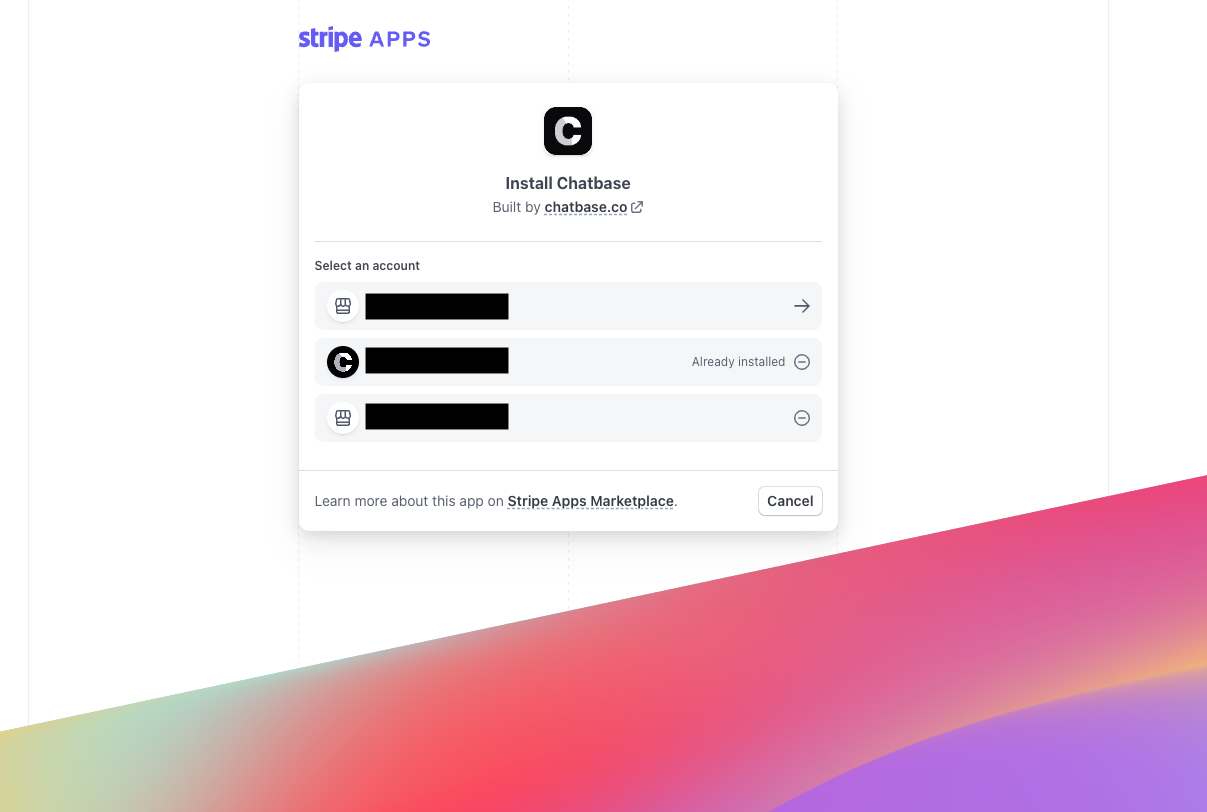
 After clicking **Continue**, choose the account you want to connect.
 If all goes well, you're redirected back to Chatbase with a message saying **Stripe integration successful**.
Add Stripe account IDs to your customers' contact records. See [Contacts](/docs/user-guides/chatbot/contacts/uploading-contacts) for details.
## Method 2: Connect with a restricted API key
Connecting with a restricted API key gives you more control, letting you choose exactly which Stripe permissions Chatbase can access.
Go to **Integrations** and select **Stripe**.
Click **Connect**, then select **Use a restricted API key**.
Create a restricted API key in Stripe and grant only the permissions you want Chatbase to use.
Copy the restricted API key from Stripe and use it to complete the connection in Chatbase.
Connecting through the Stripe app is still the recommended option. Use a restricted API key when you want more granular control over the permissions granted to Chatbase.
Test the integration from your live site, signed in as an identified customer, and confirm the AI agent can retrieve that customer's subscription details.
## Limitations
* **Stripe actions need an authenticated customer.** Each customer must be identified, and matched to a contact record holding their `stripe_account`.
* **In the Playground, they only run through Chat as user.** Start the conversation with [Chat as user](/docs/user-guides/chatbot/playground#chat-as-user) and a **User ID** that matches a contact with a valid `stripe_account`. **Action Preview** and **Compare** can't identify a customer, so the actions don't run there.
## Next steps
Enable the actions that let customers check their subscription, review invoices, change plans, and update billing details from the chat.
If all goes well, you're redirected back to Chatbase with a message saying **Stripe integration successful**.
Add Stripe account IDs to your customers' contact records. See [Contacts](/docs/user-guides/chatbot/contacts/uploading-contacts) for details.
## Method 2: Connect with a restricted API key
Connecting with a restricted API key gives you more control, letting you choose exactly which Stripe permissions Chatbase can access.
Go to **Integrations** and select **Stripe**.
Click **Connect**, then select **Use a restricted API key**.
Create a restricted API key in Stripe and grant only the permissions you want Chatbase to use.
Copy the restricted API key from Stripe and use it to complete the connection in Chatbase.
Connecting through the Stripe app is still the recommended option. Use a restricted API key when you want more granular control over the permissions granted to Chatbase.
Test the integration from your live site, signed in as an identified customer, and confirm the AI agent can retrieve that customer's subscription details.
## Limitations
* **Stripe actions need an authenticated customer.** Each customer must be identified, and matched to a contact record holding their `stripe_account`.
* **In the Playground, they only run through Chat as user.** Start the conversation with [Chat as user](/docs/user-guides/chatbot/playground#chat-as-user) and a **User ID** that matches a contact with a valid `stripe_account`. **Action Preview** and **Compare** can't identify a customer, so the actions don't run there.
## Next steps
Enable the actions that let customers check their subscription, review invoices, change plans, and update billing details from the chat.