> ## Documentation Index
> Fetch the complete documentation index at: https://chatbase.co/docs/llms.txt
> Use this file to discover all available pages before exploring further.
# Webflow
> Embed your Chatbase AI agent on a Webflow site inside a container you control
## Overview
Adding your Chatbase AI agent to a Webflow site takes the iFrame embed code from your Chatbase dashboard plus a container on your page. The container matters: without one, the widget stretches the full width of the page.
Put your AI agent in front of every visitor to your Webflow site, sized and placed exactly where you want it.
## Before you start
* A Chatbase account with an AI agent. If you haven't built one yet, follow [Your first AI agent](/docs/user-guides/quick-start/your-first-agent).
* A Webflow site you can edit in the Designer.
## How to embed your AI agent
1. Go to the [dashboard](https://www.chatbase.co/dashboard/) of your Chatbase account.
2. Click the AI agent you wish to integrate into your Webflow website.
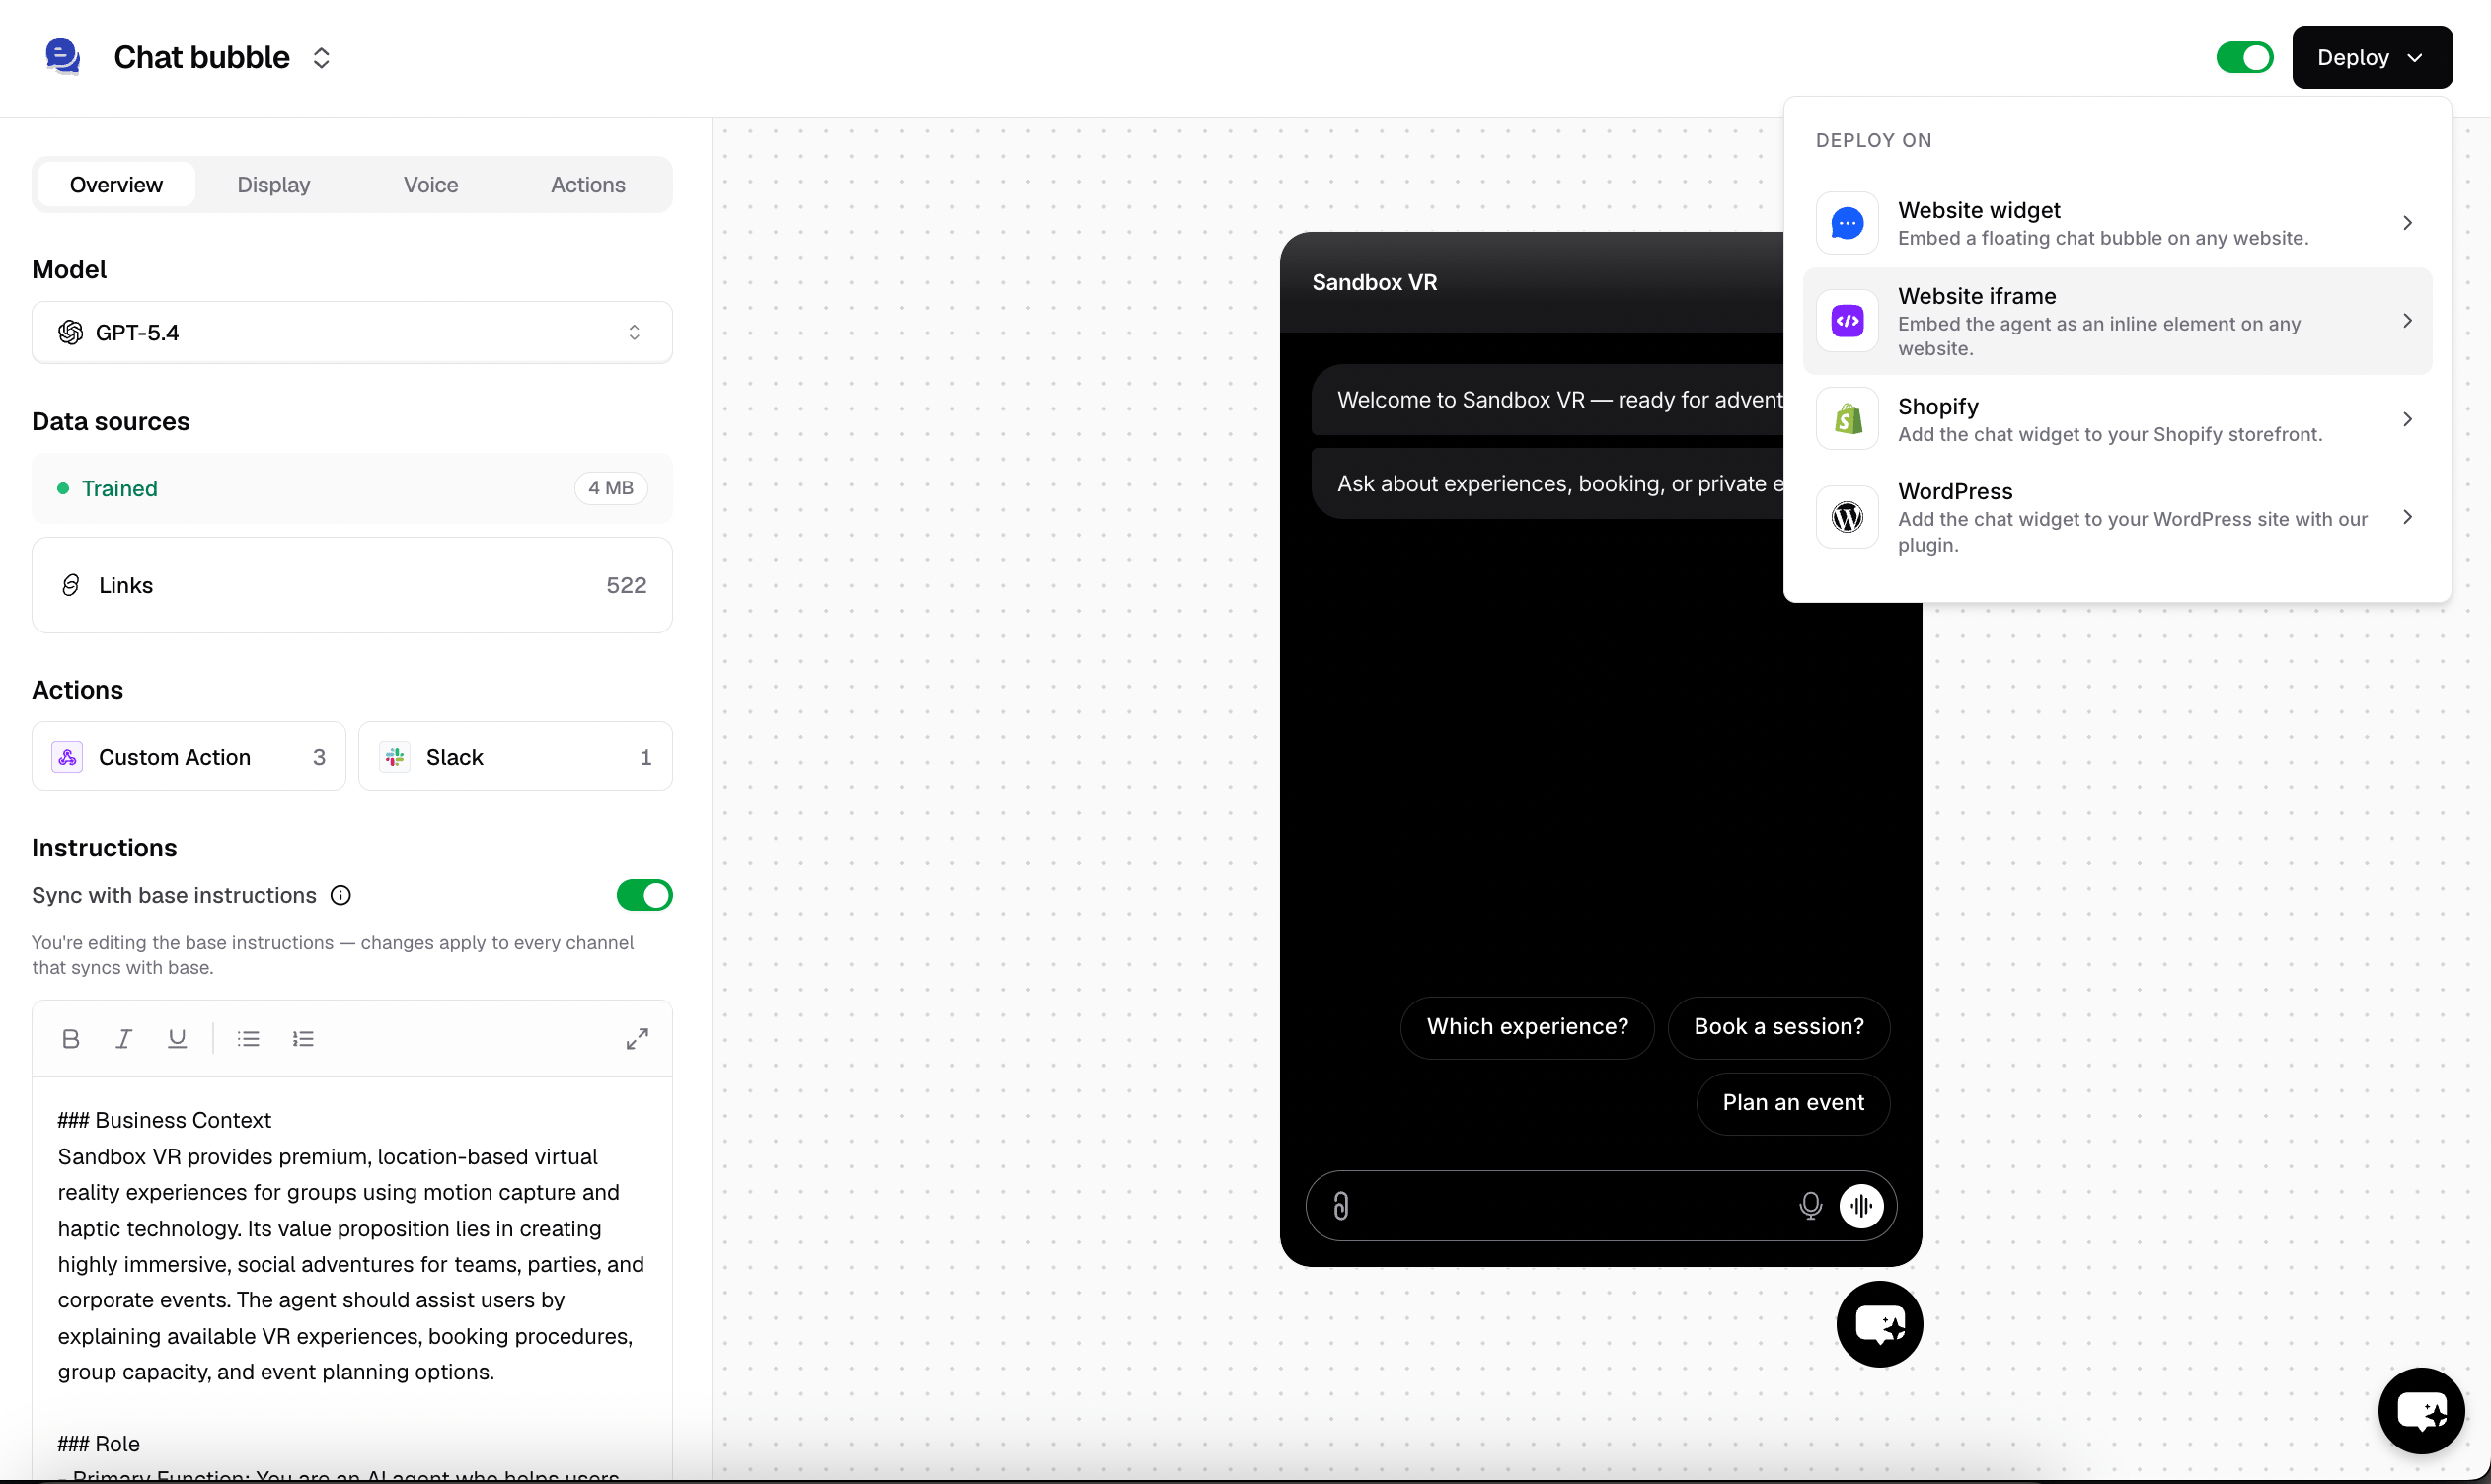
3. Click **Channels** in the left sidebar, then click **Manage** on the **Chat bubble** card (or **Setup**, if you haven't configured it yet).
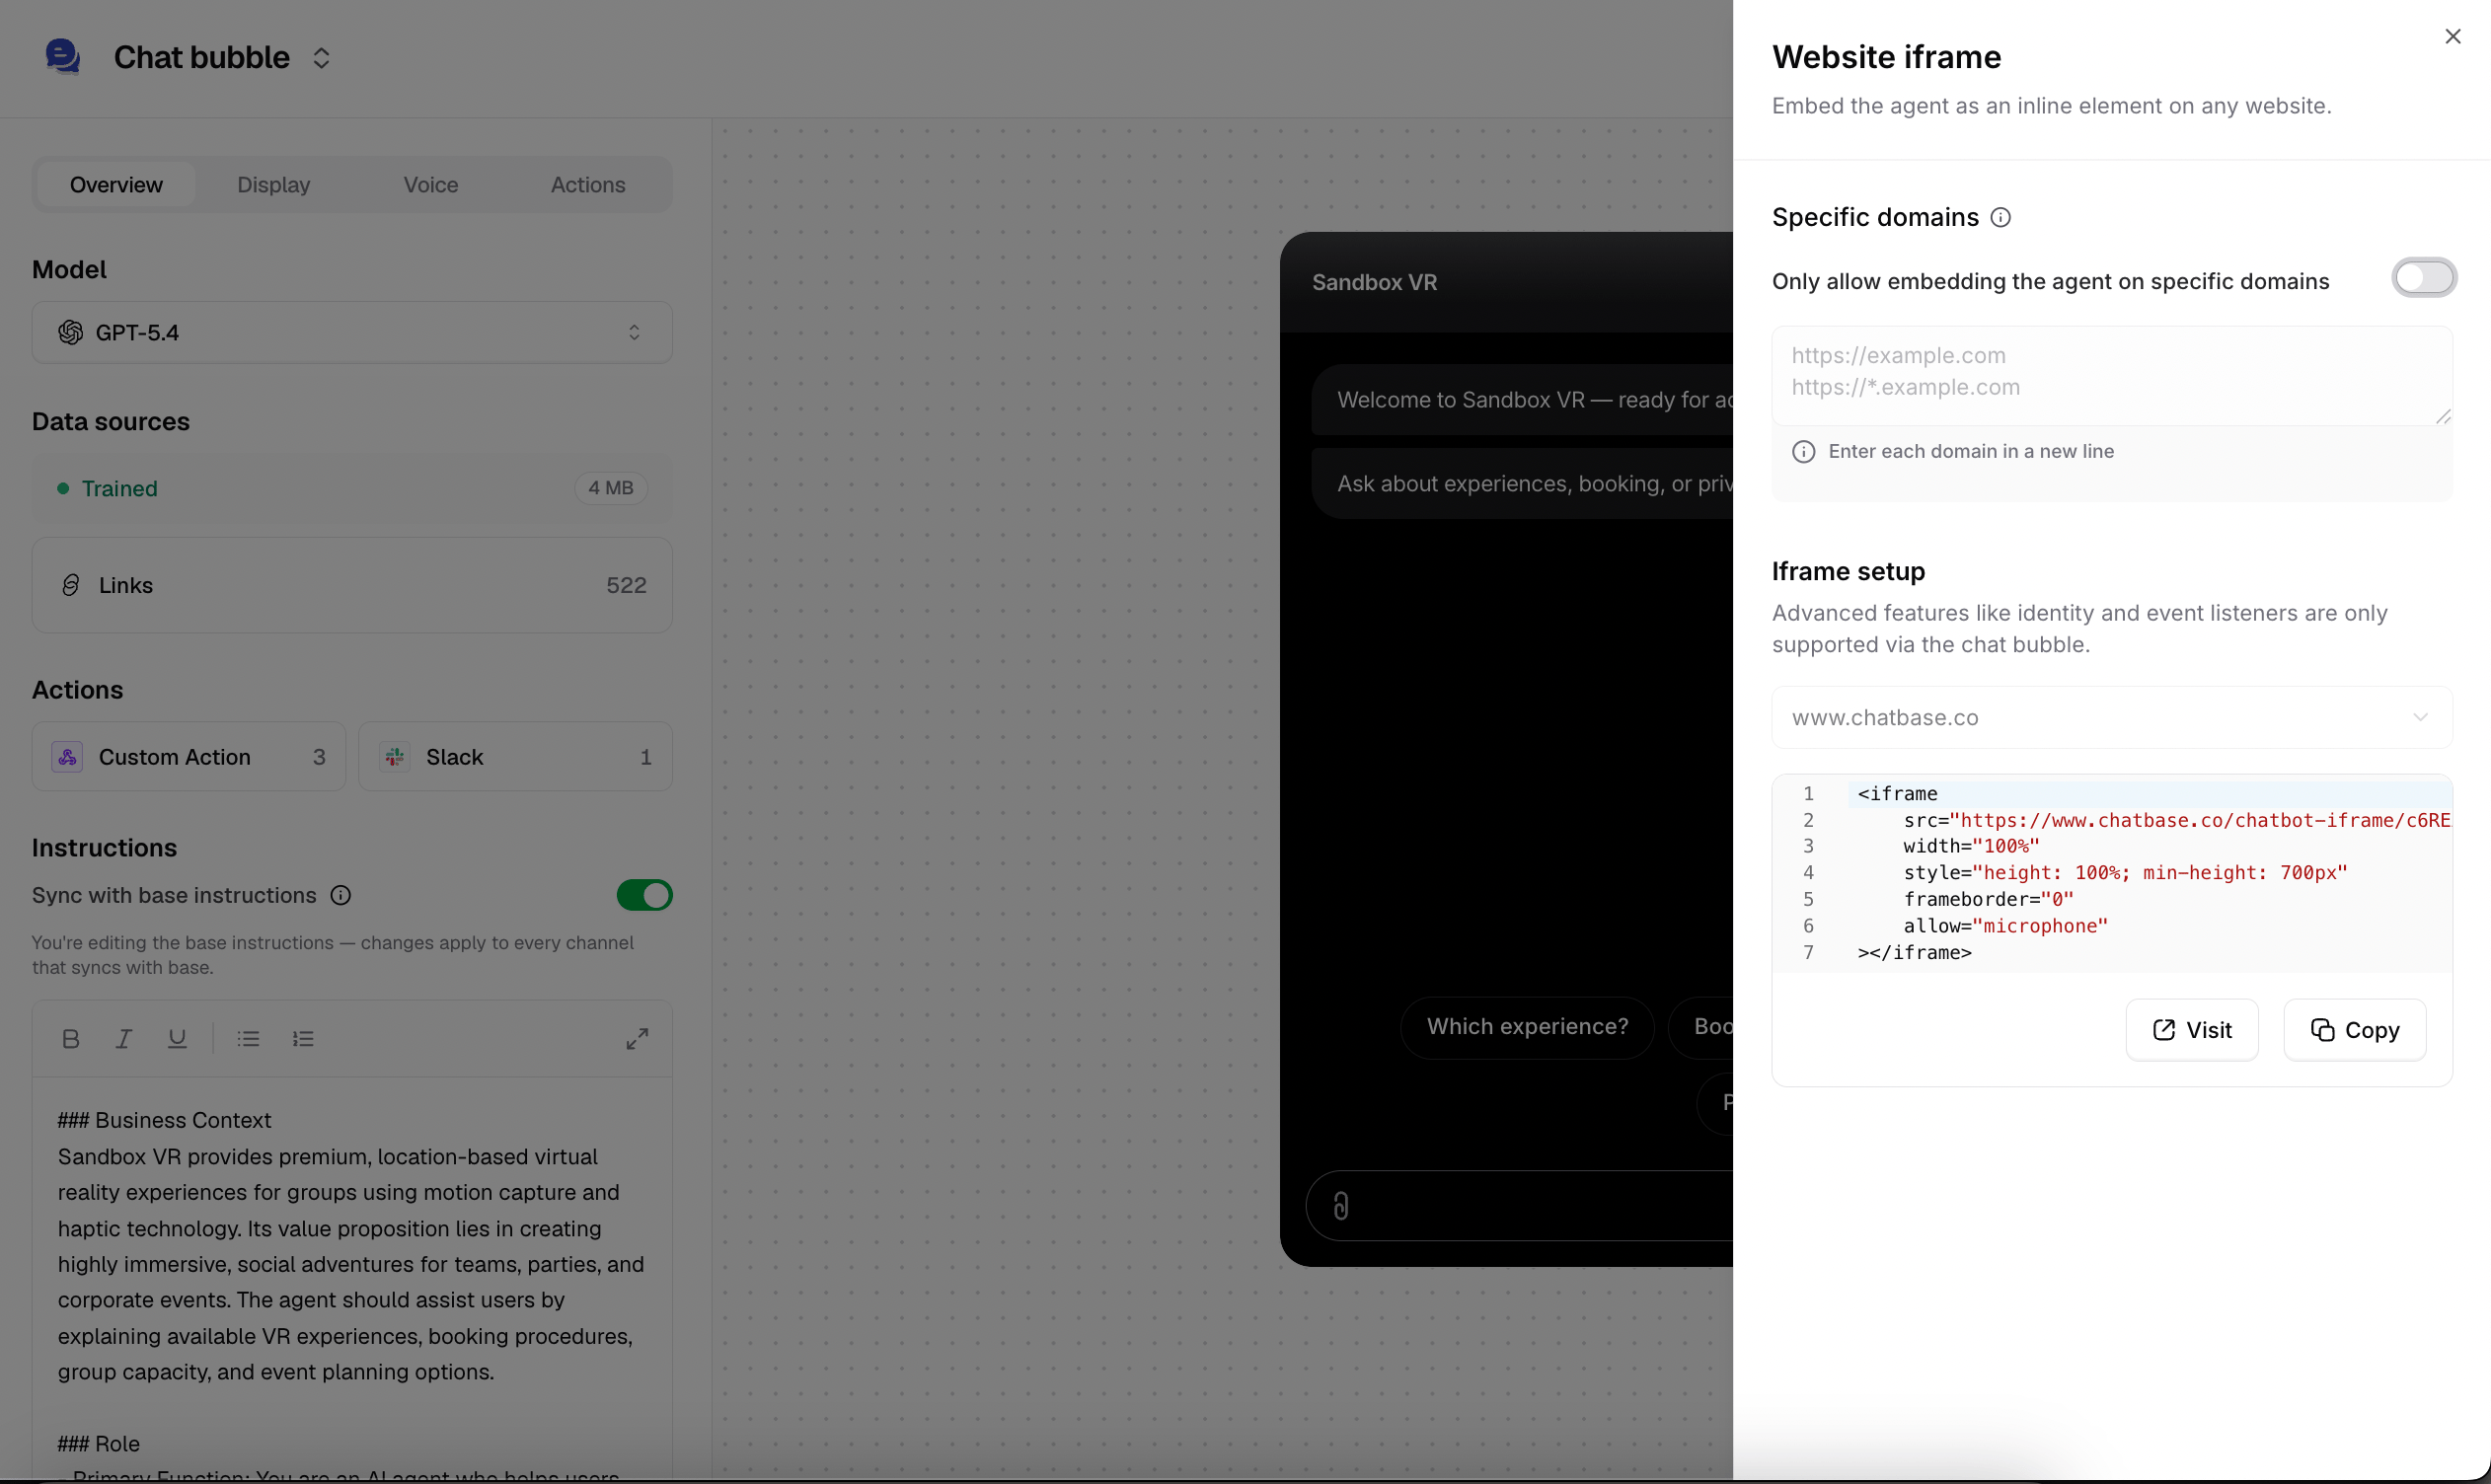
4. Click **Deploy** and select the **Website iFrame** embed type. Click **Copy** to copy the provided HTML code.
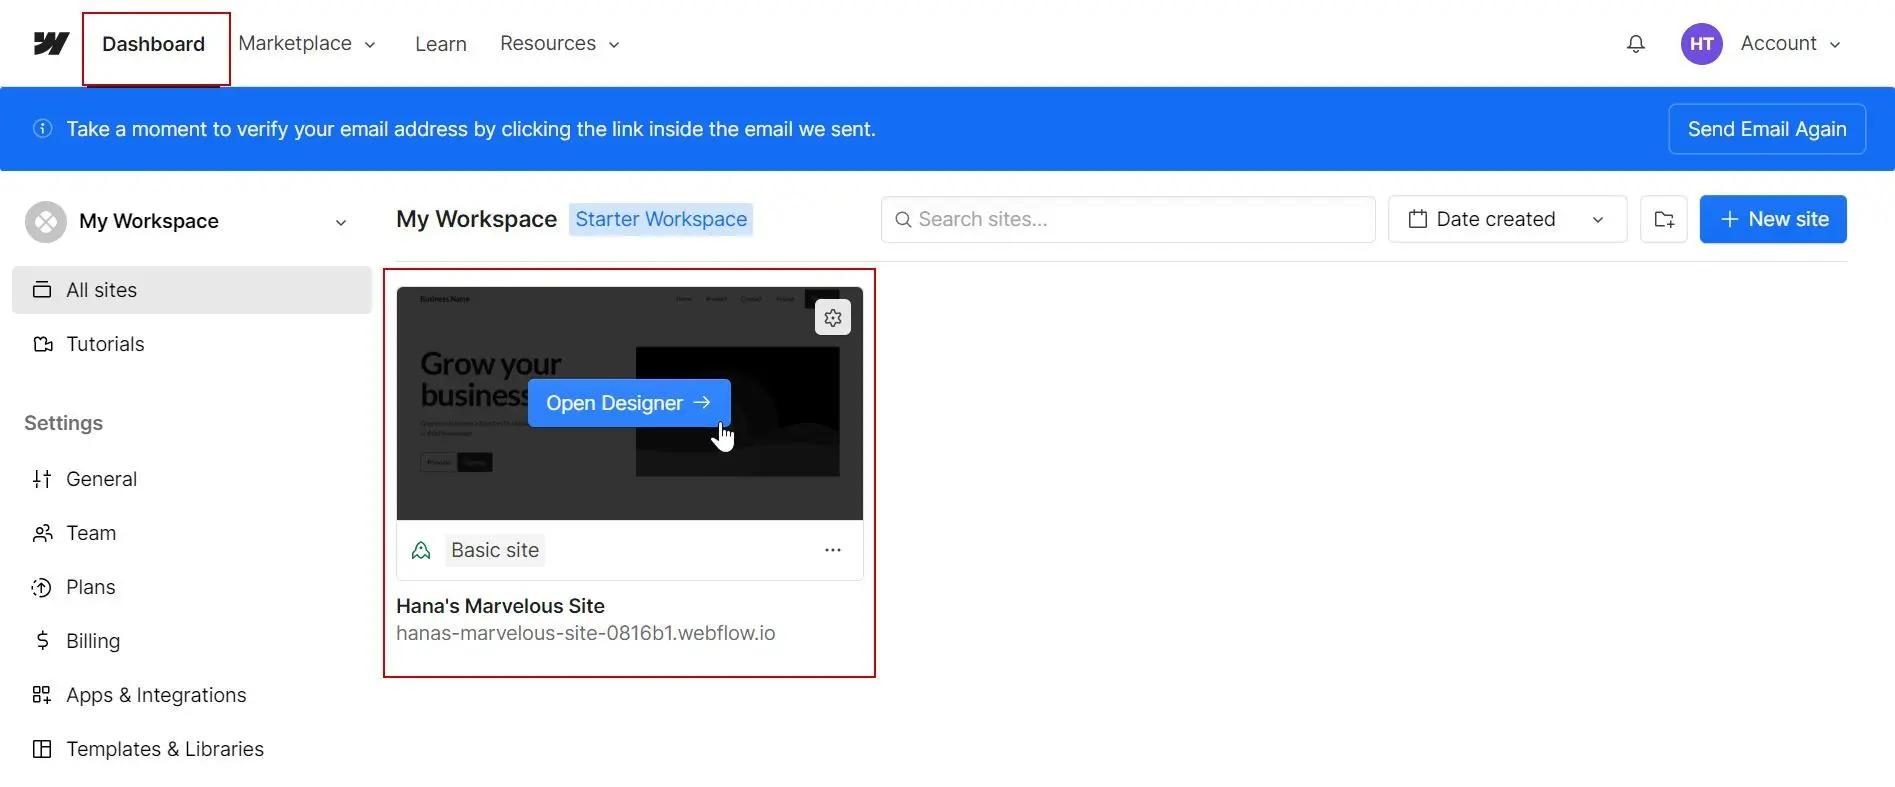
 Log into Webflow and go to your dashboard. Hover over the site you want to add the AI agent to and click **Open Designer**.
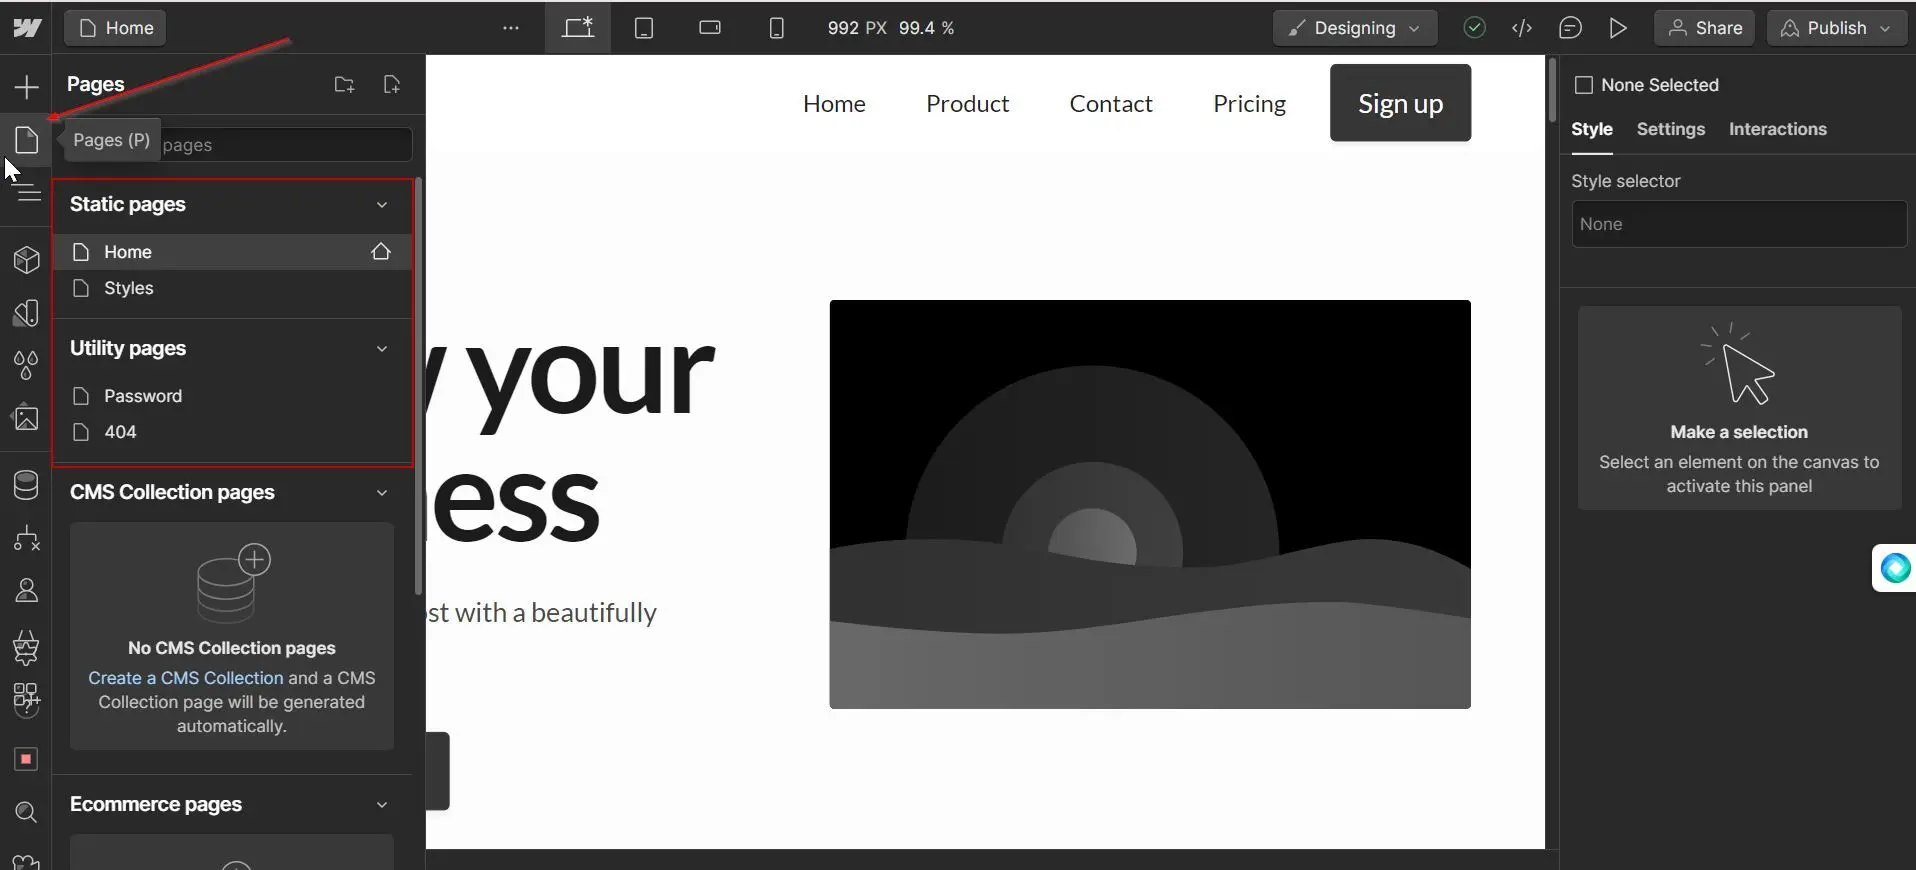
 Click the file icon (**Pages**) in the top-left corner and select the page you want to embed the AI agent on.
 A container keeps the widget from spanning the entire width of the page.
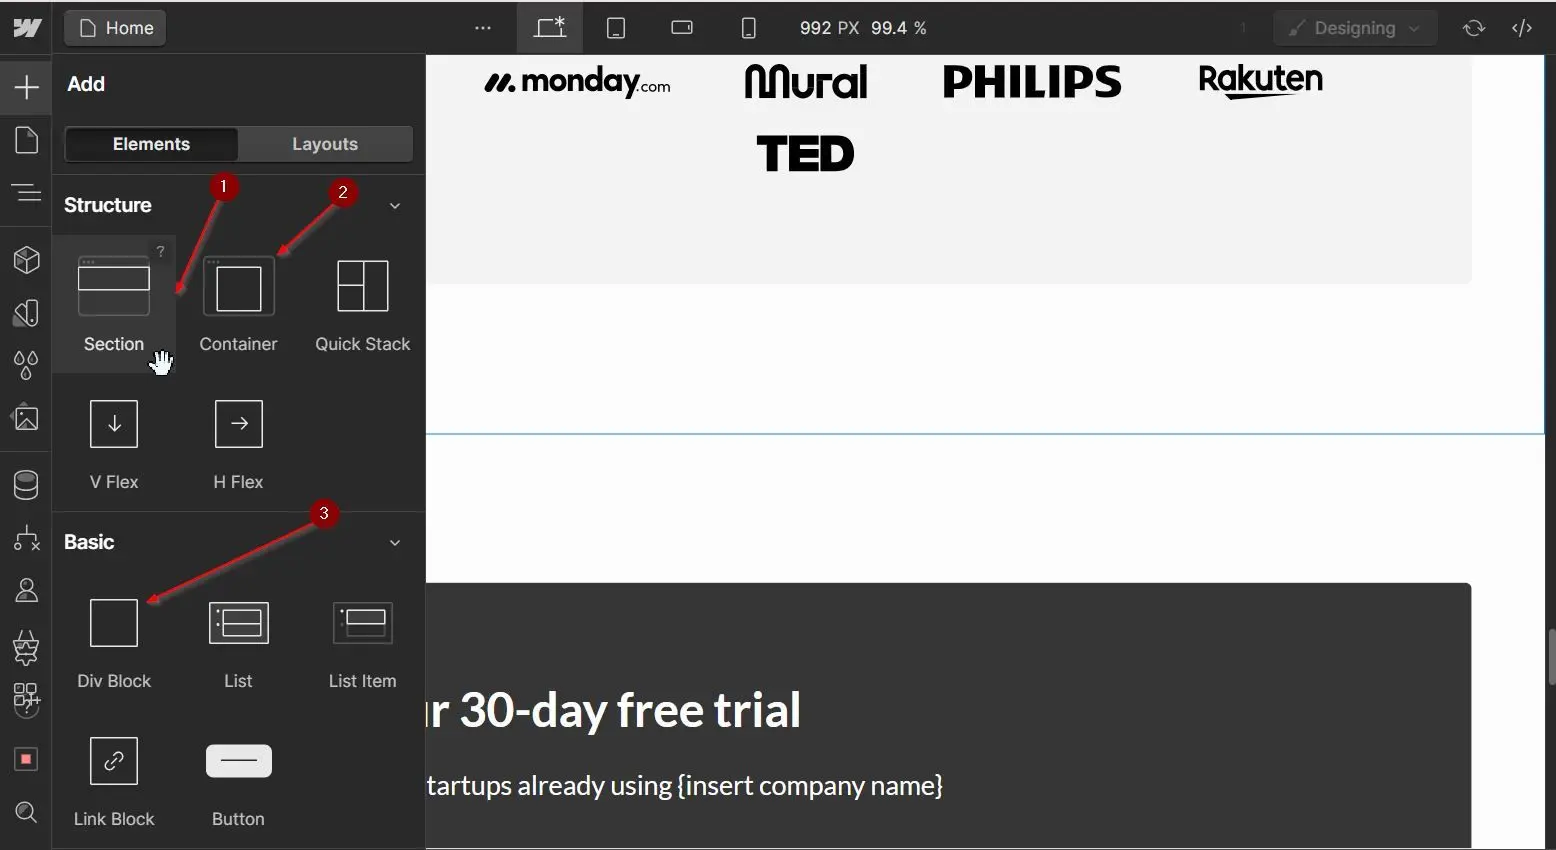
1. Click the plus button (**Add elements**) in the top-left corner of the Designer.
2. Drag a **Section** element to the part of the page where you want the AI agent.
3. Drag a **Container** element onto the Section.
4. Drag a **Div** element onto the Container, and set its size so the AI agent stays contained.
A container keeps the widget from spanning the entire width of the page.
1. Click the plus button (**Add elements**) in the top-left corner of the Designer.
2. Drag a **Section** element to the part of the page where you want the AI agent.
3. Drag a **Container** element onto the Section.
4. Drag a **Div** element onto the Container, and set its size so the AI agent stays contained.
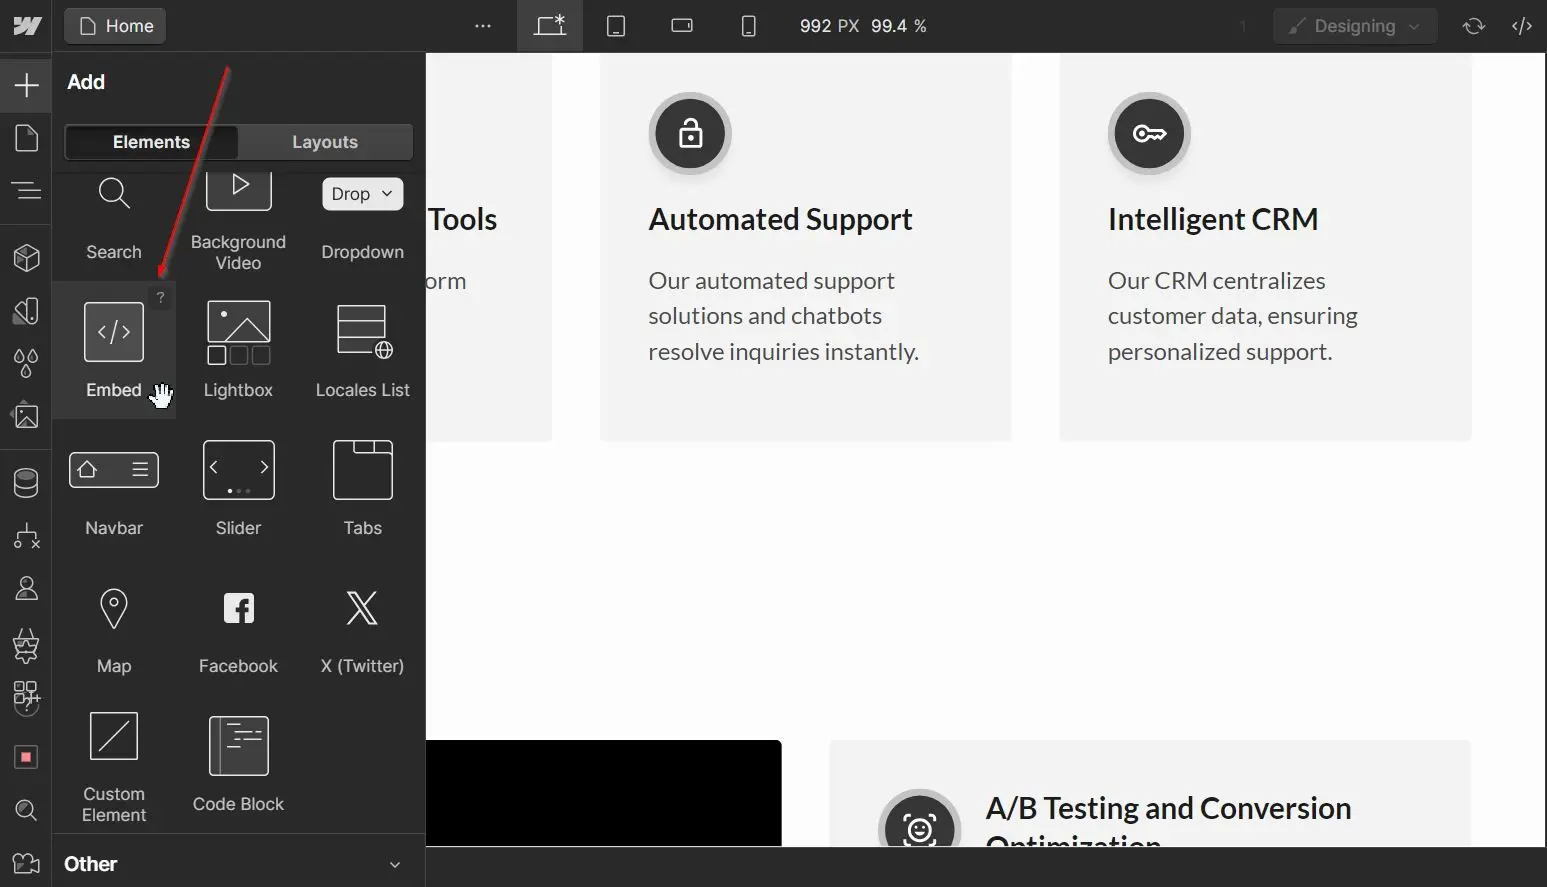
 Scroll down the list of elements and drag the **Embed** element onto the Div you just added.
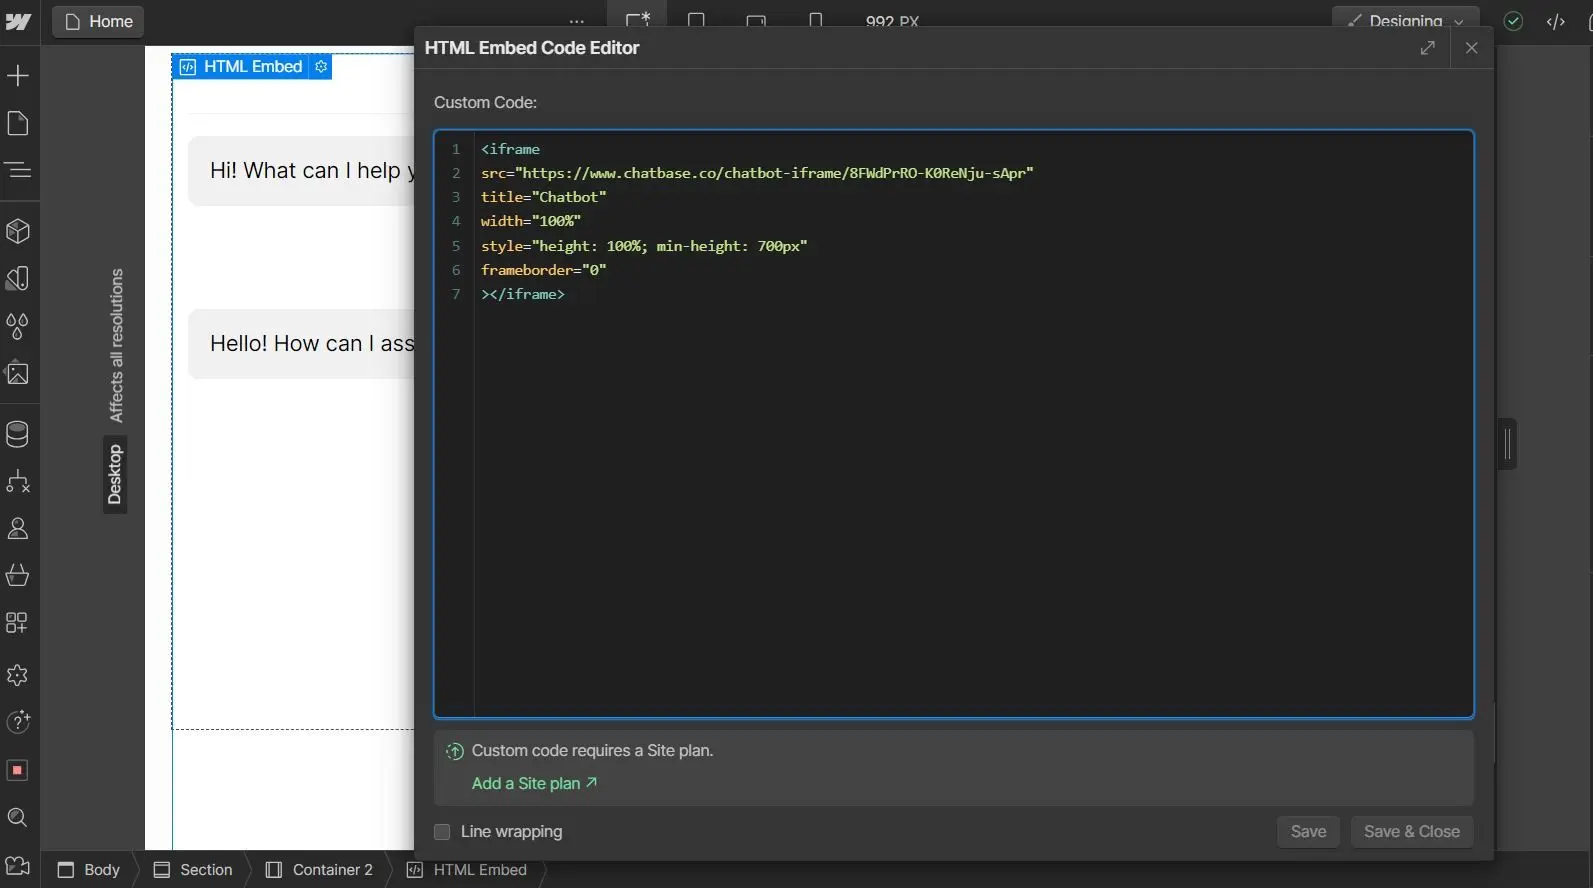
 Double-click the Embed element to open the HTML editor, paste your Chatbase embed code, and click **Save & Close**.
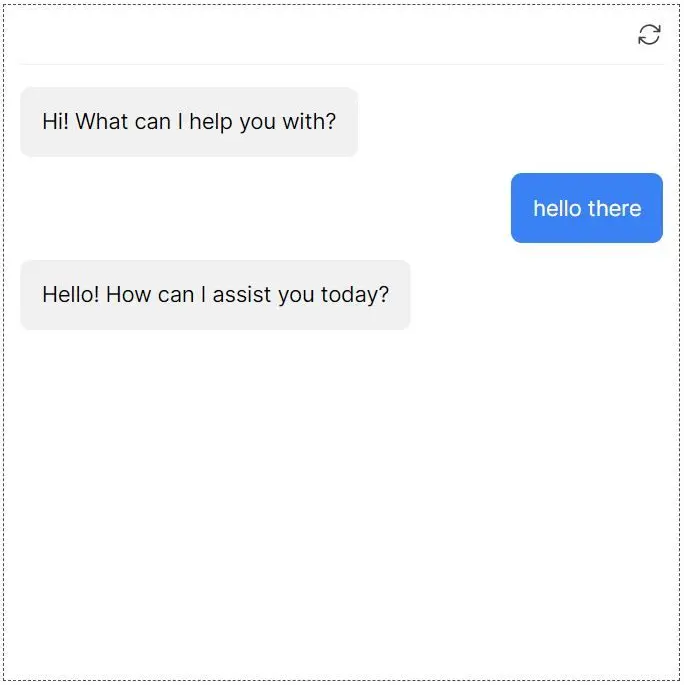
 You should see a preview of the AI agent on the live preview of your Webflow site, right inside the Designer.
 ## Troubleshooting
**Possible cause:** Webflow's layout components take some getting used to, and the Embed element inherits its size from the Div you placed it in.
**Solution:** adjust the size of the Div that wraps the Embed element. Webflow's [official documentation on the Embed element](https://university.webflow.com/lesson/custom-code-embed?topics=elements) covers embedding third-party tools in more detail.
You can customize the appearance and colors of your AI agent on your Chatbase dashboard. Go to your **dashboard**, choose an AI agent, click **Channels** in the left sidebar, click **Manage** on the **Chat bubble** card, then open the **Display** tab to edit Content, Capabilities, Colors, Floating bubble, and Localization.
## Next steps
Match the widget to your brand colors, position, and copy.
## Troubleshooting
**Possible cause:** Webflow's layout components take some getting used to, and the Embed element inherits its size from the Div you placed it in.
**Solution:** adjust the size of the Div that wraps the Embed element. Webflow's [official documentation on the Embed element](https://university.webflow.com/lesson/custom-code-embed?topics=elements) covers embedding third-party tools in more detail.
You can customize the appearance and colors of your AI agent on your Chatbase dashboard. Go to your **dashboard**, choose an AI agent, click **Channels** in the left sidebar, click **Manage** on the **Chat bubble** card, then open the **Display** tab to edit Content, Capabilities, Colors, Floating bubble, and Localization.
## Next steps
Match the widget to your brand colors, position, and copy.