> ## Documentation Index
> Fetch the complete documentation index at: https://chatbase.co/docs/llms.txt
> Use this file to discover all available pages before exploring further.
# Zapier
> Connect your AI agent to Zapier to send leads and conversation data into thousands of other apps
## Overview
Integrating Chatbase with Zapier lets you send what your AI agent collects into thousands of other apps, with no code. This guide walks through one complete example, collecting leads with your AI agent and appending them to a Google Docs file, but the same trigger works for any Zapier action.
Push leads and conversation data straight into your CRM, spreadsheet, or inbox the moment your AI agent captures them.
## Before you start
* A Chatbase account with an AI agent. If you haven't built one yet, follow [Your first AI agent](/docs/user-guides/quick-start/your-first-agent).
* An active Zapier account.
* Your Chatbase **API key** and **Agent ID** (see the steps below for where to find each).
## What you can automate
| Automation | How it works |
| ------------------------------------------------- | ------------------------------------------------------------------------------------------------------------------------------------------------------------- |
| **Draft responses to customer emails** | Send new customer emails to Chatbase, have it draft a relevant response from your documentation, and save the response as a draft or send it directly |
| **Categorize and prioritize support emails** | Connect Chatbase to Gmail or Outlook, have it analyze tone and content, categorize emails as urgent or by topic, and add follow-up tasks to your project tool |
| **Add AI-generated solutions to support tickets** | Send new ticket details from Jira, Intercom, or Zendesk to Chatbase, and add the suggested solution back onto the ticket |
| **Analyze customer feedback forms** | Connect Chatbase to Typeform or Google Forms, analyze feedback for intent, tone, and sentiment, and send summaries to email, Slack, or a spreadsheet |
## How to connect Zapier
1. Sign in to your Chatbase account to access your dashboard.
2. Click the AI agent you want to set up lead collection for.
3. From the sidebar, click **Build > Actions**, then select **Create action** and set up your [Collect Leads action](/docs/user-guides/chatbot/actions/collect-leads).
1. Sign in to your Zapier account.
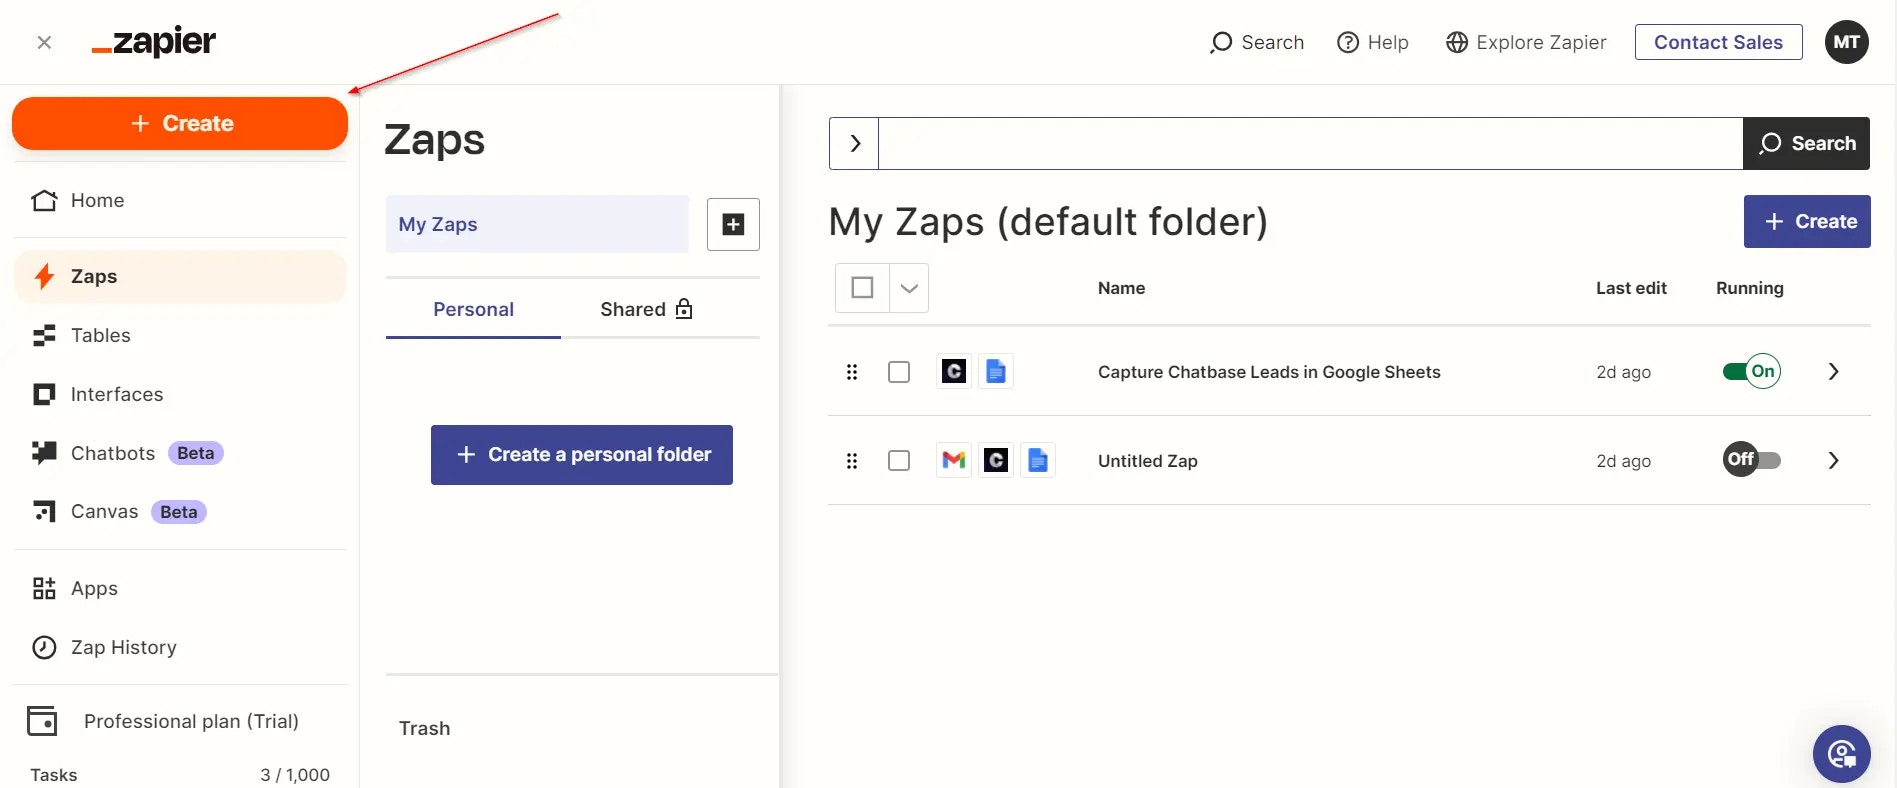
2. Click **Create**, then **Zaps**, in the top-left corner of the Zapier homepage.
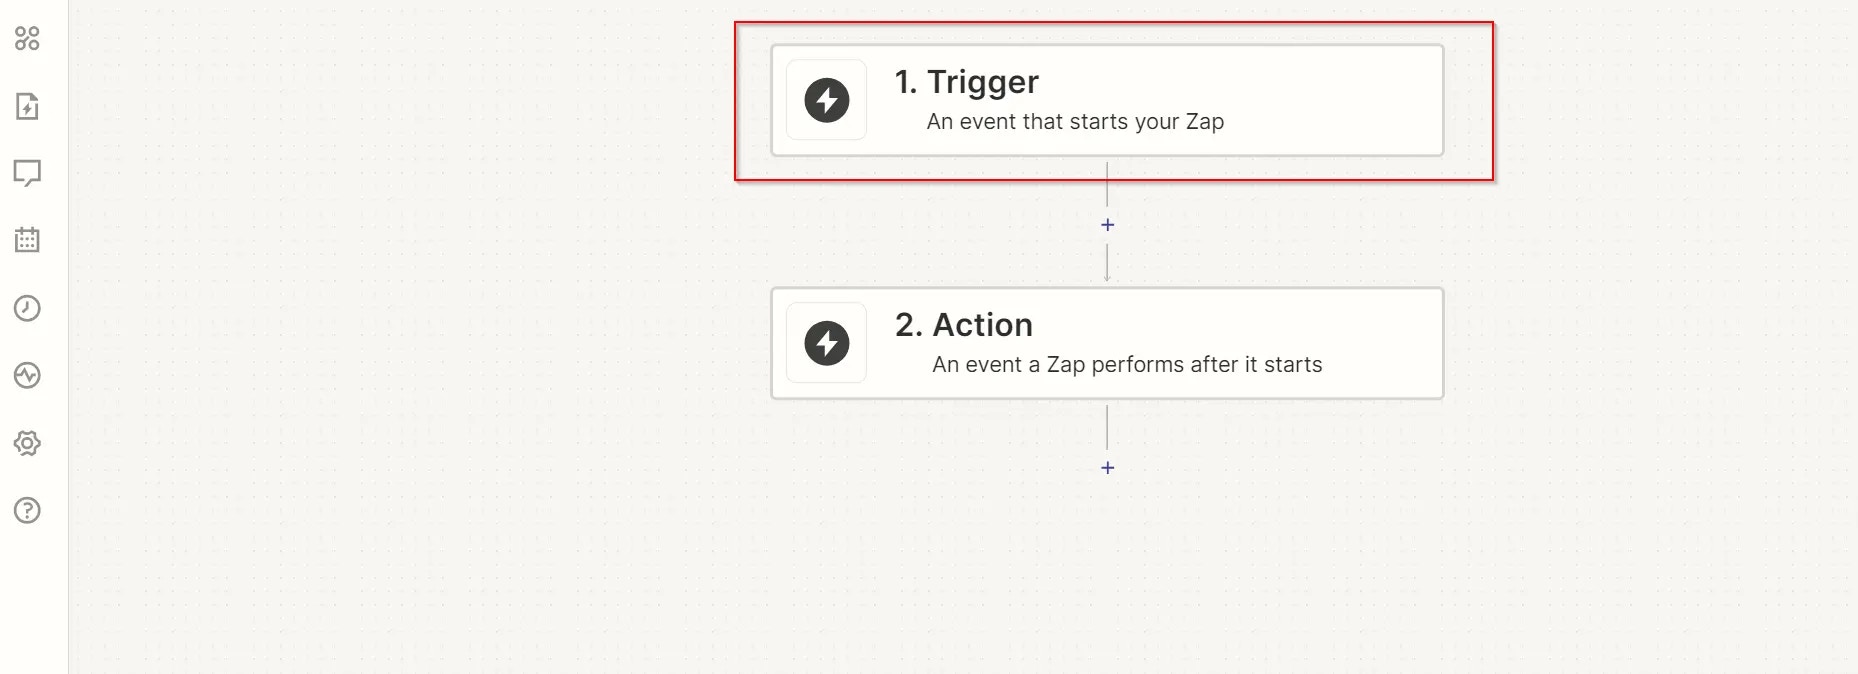
 3. In the Zap editor, click **Trigger**.
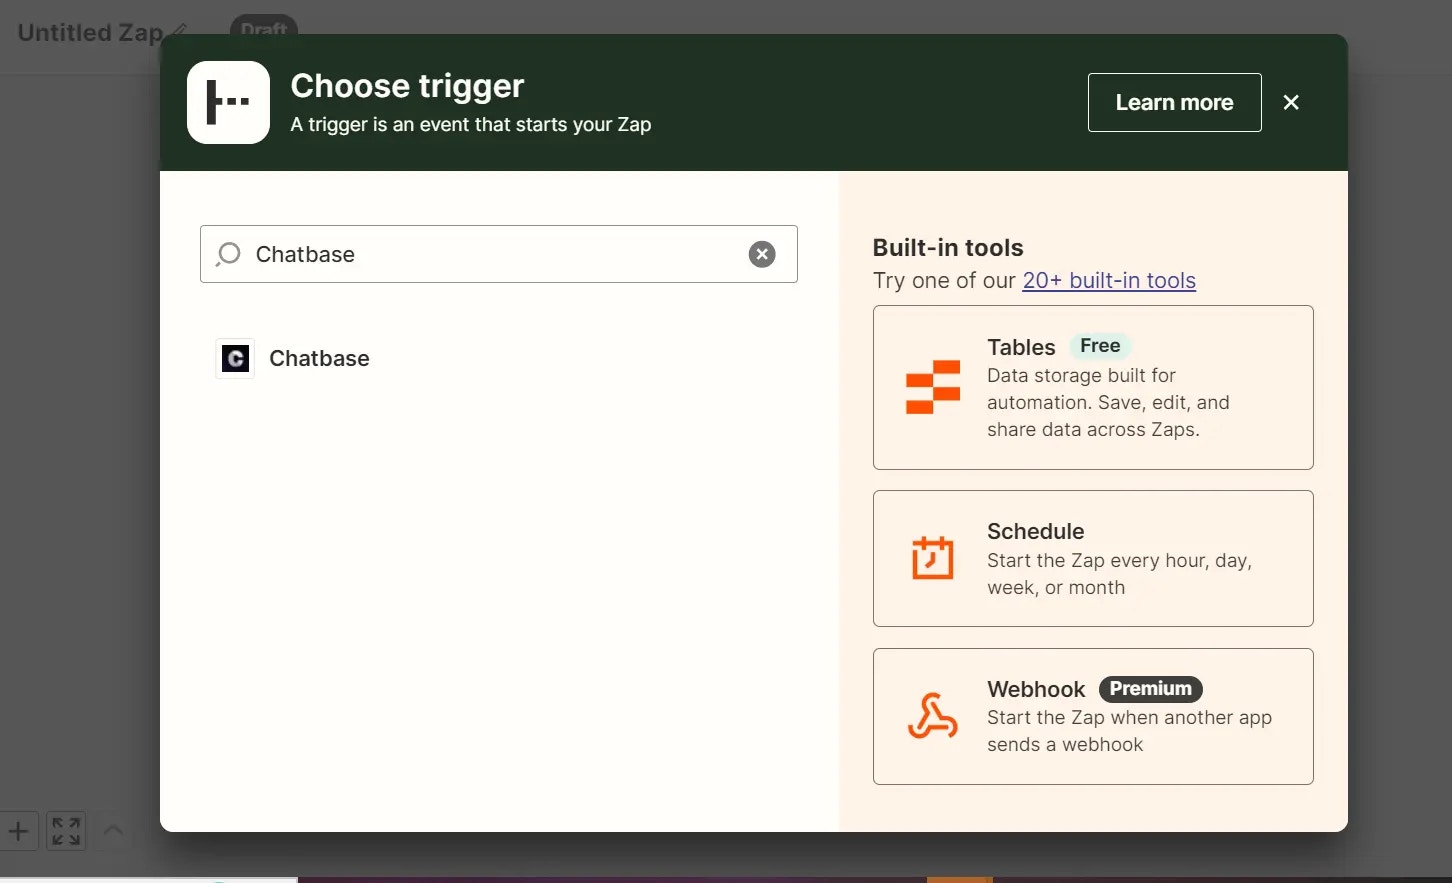
 4. Search for **Chatbase** in the search bar and click it.
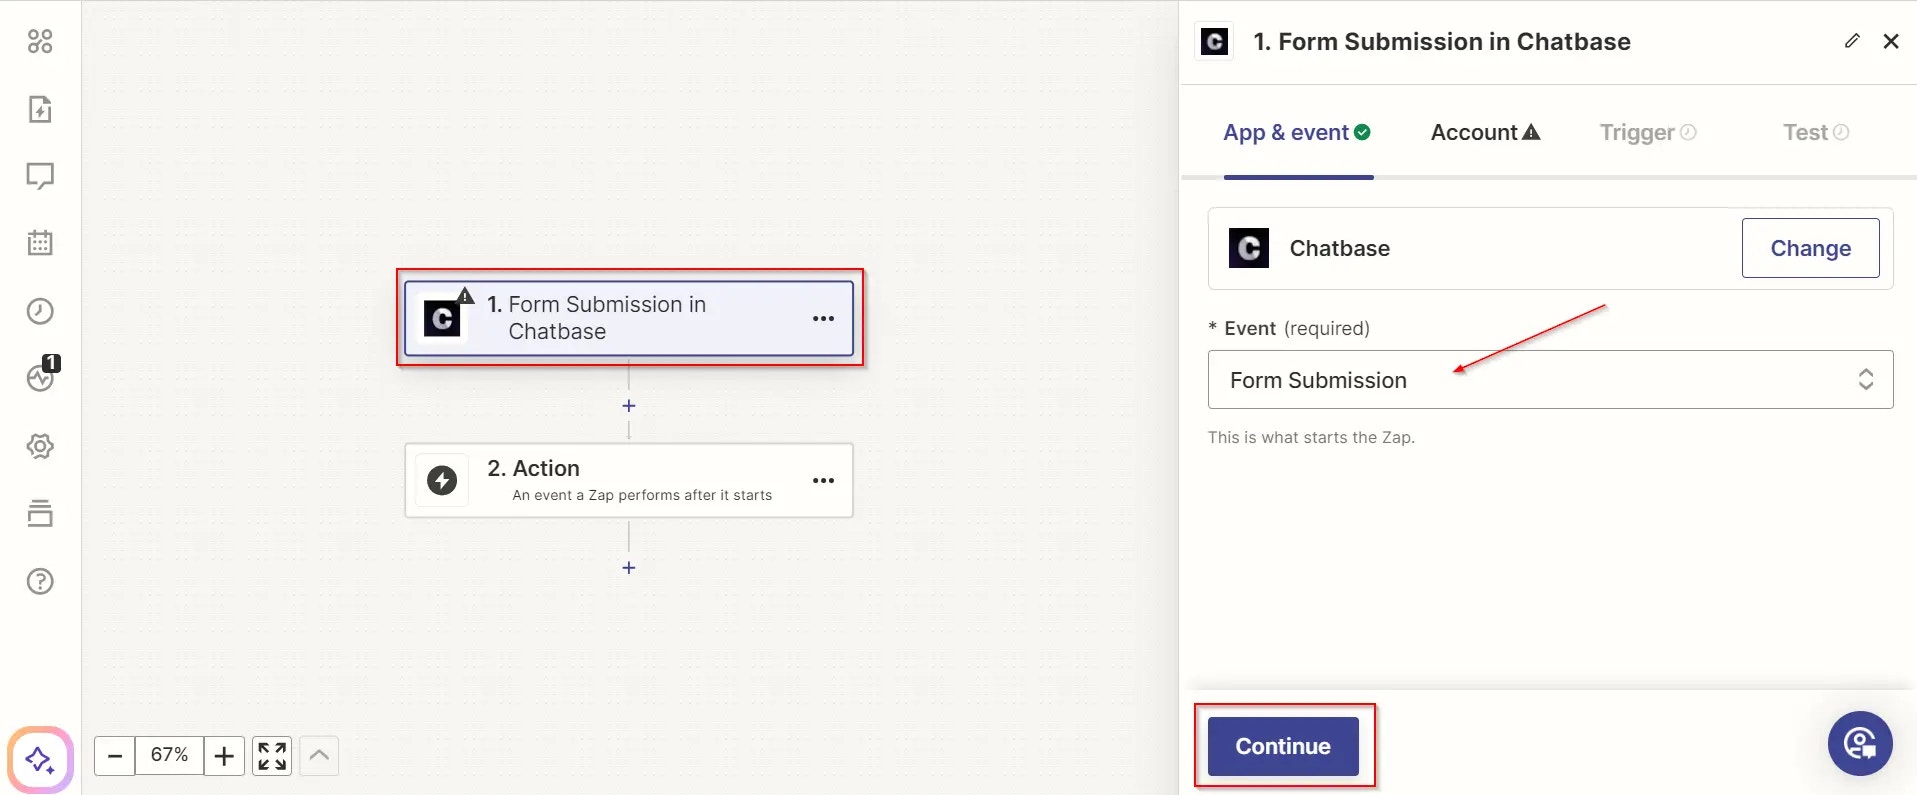
 5. On the right side of the page, click the **Event** field and select **Form Submission**, then click **Continue**.
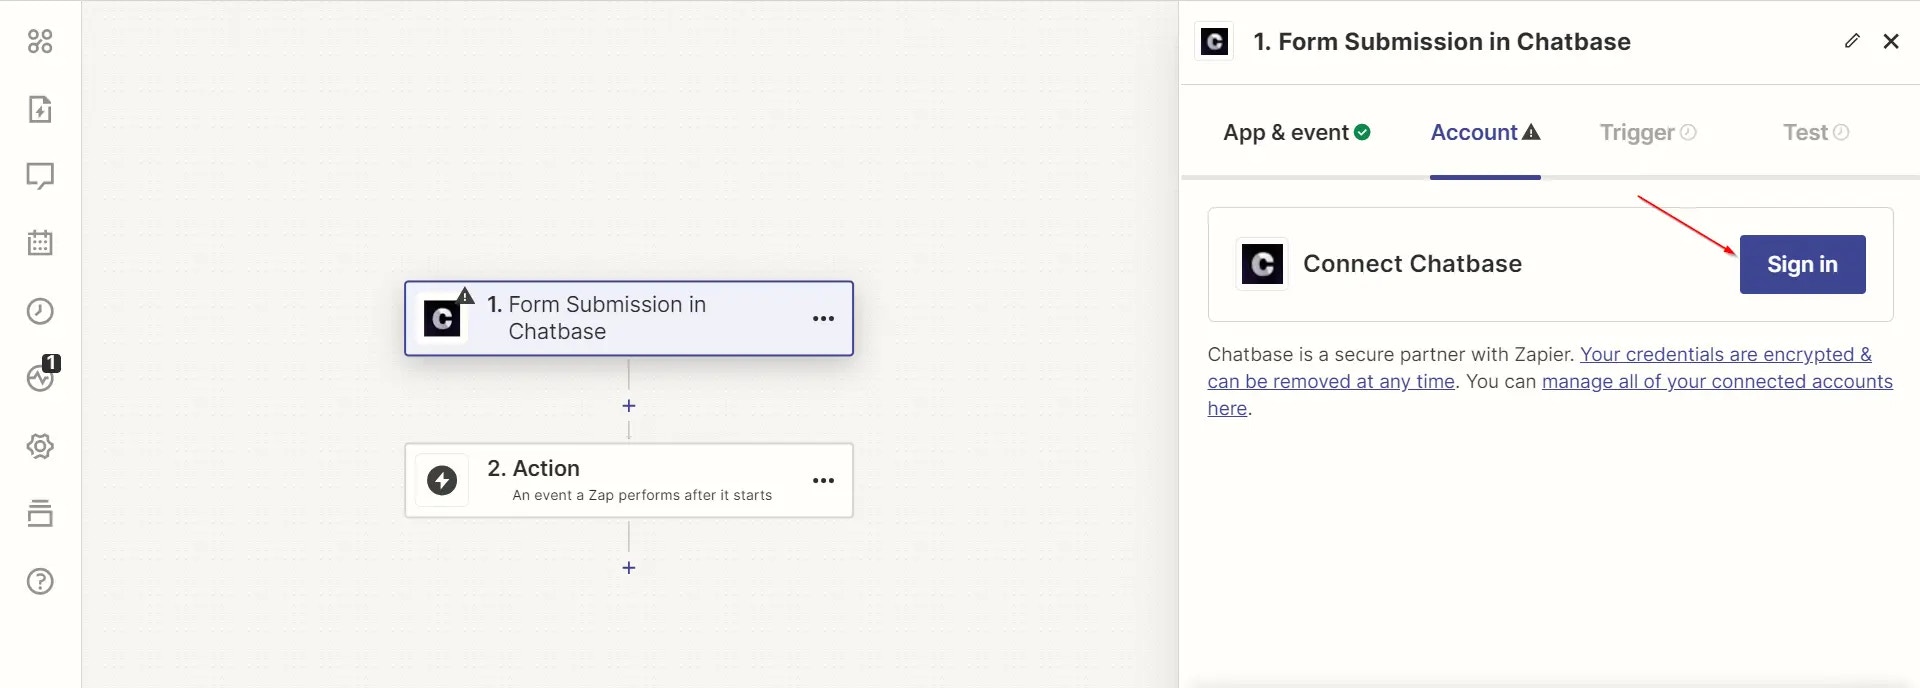
 Click **Sign in** on the next page. On the authentication page, provide your Chatbase API key and, optionally, a display name, then click **Yes, Continue to Chatbase**.
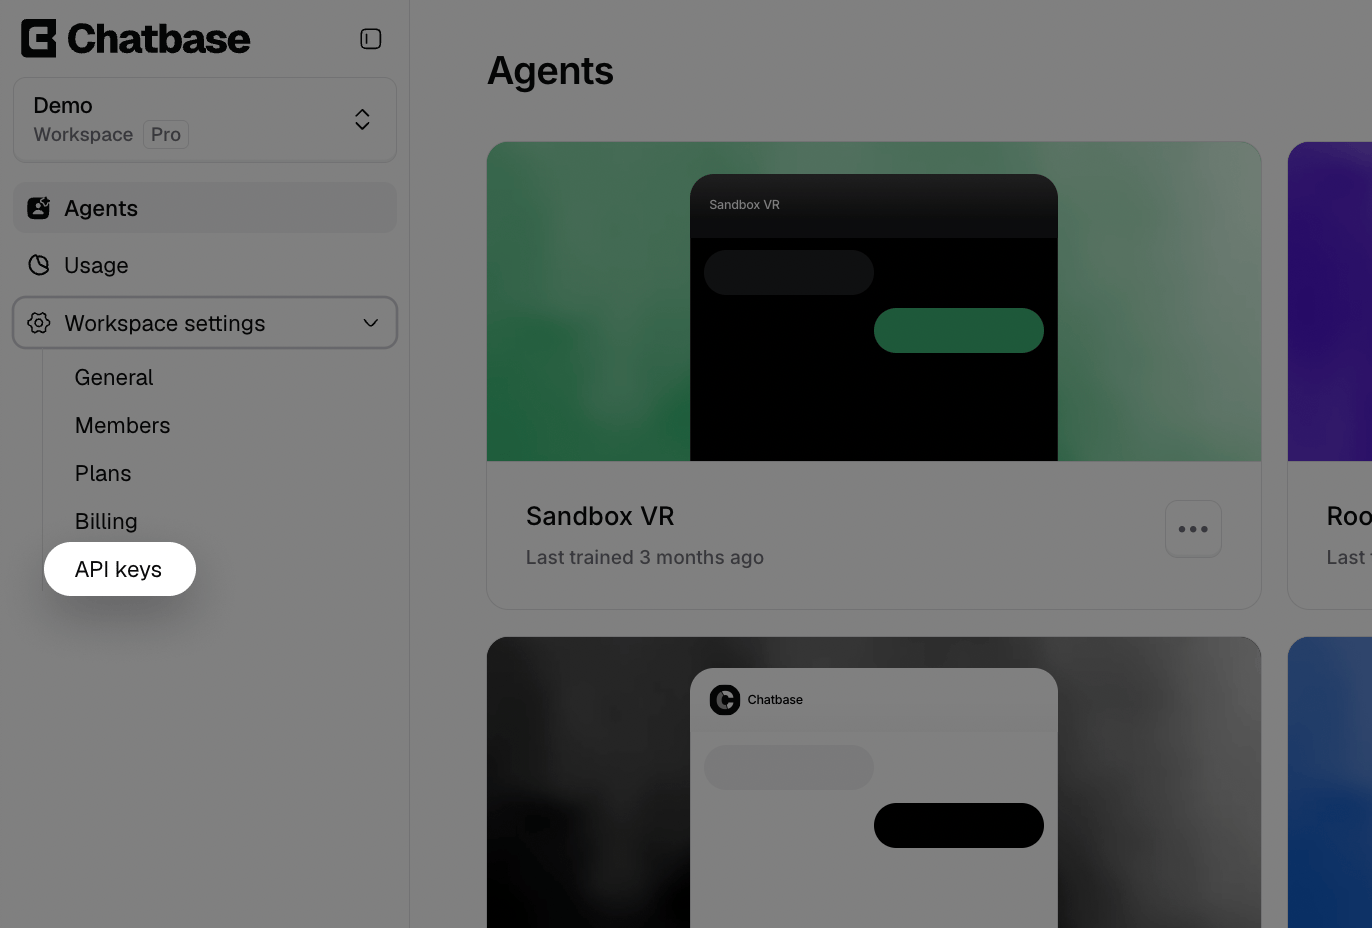
 To get your API key, head to your [account dashboard](https://www.chatbase.co/dashboard/), go to **Workspace settings**, then select **API keys** in the sidebar. Copy an existing key, or click **Create API Key** to create a new one.
 1. Click **Continue** after authenticating.
2. Paste your Agent ID in the provided input field and click **Continue**.
To find your Agent ID, open the AI agent you want to link with Zapier, go to **Settings → General**, and copy the **Agent ID** from the **Agent details** card.
3. Click **Test Trigger**.
1. Click **Continue** after authenticating.
2. Paste your Agent ID in the provided input field and click **Continue**.
To find your Agent ID, open the AI agent you want to link with Zapier, go to **Settings → General**, and copy the **Agent ID** from the **Agent details** card.
3. Click **Test Trigger**.
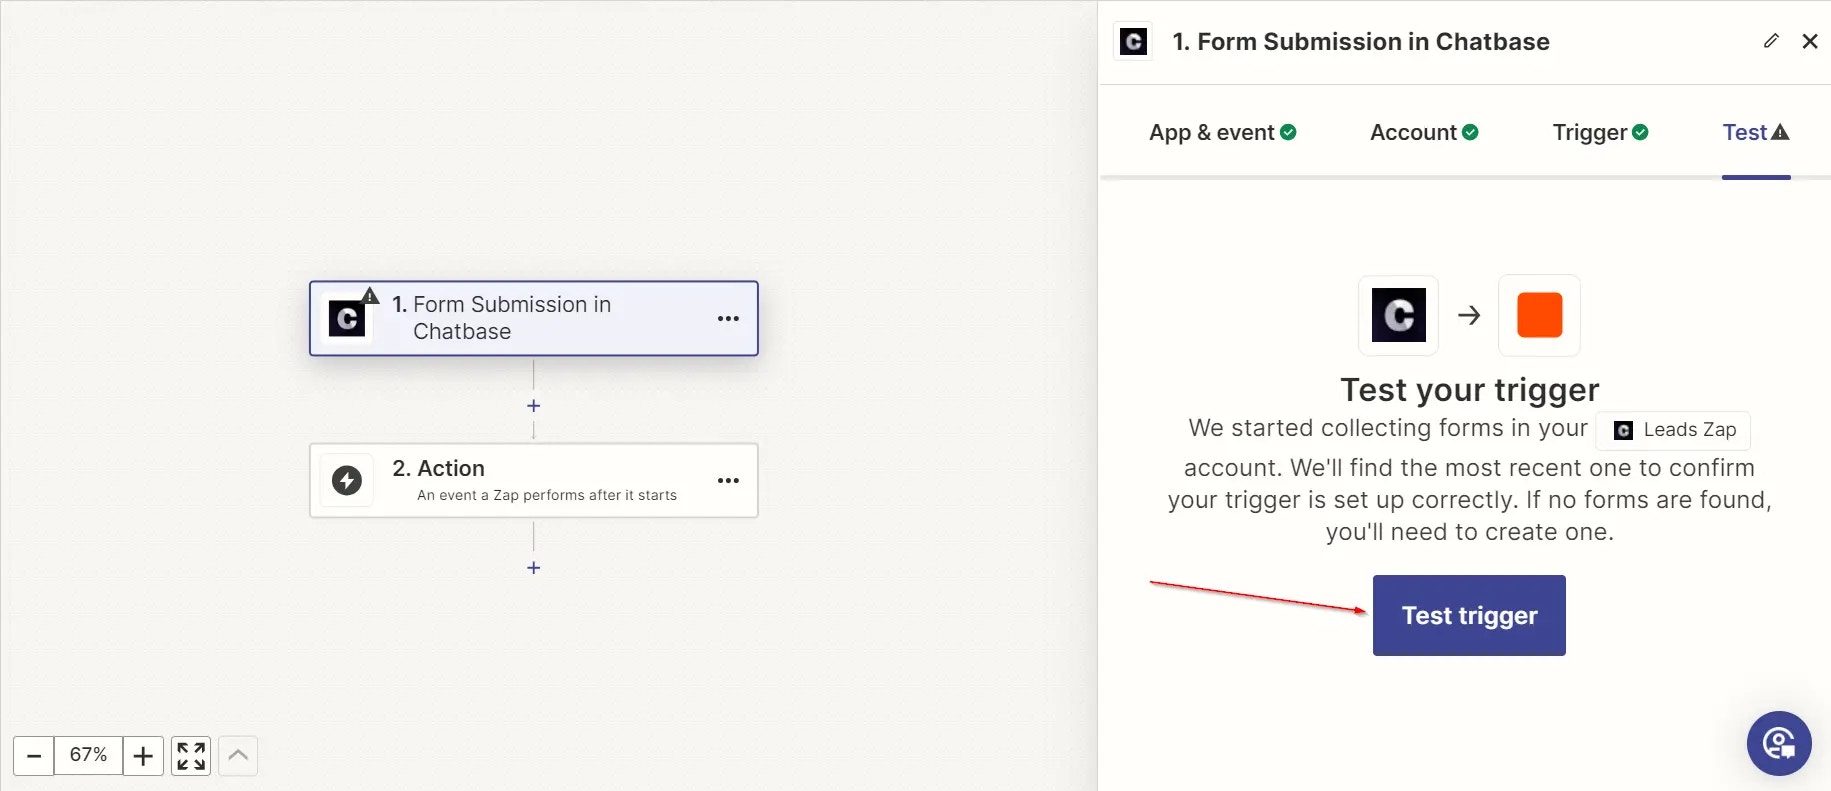 4. When prompted, click **Continue with selected records**.
1. A window appears with a list of apps. Search for **Google Docs** and click it.
4. When prompted, click **Continue with selected records**.
1. A window appears with a list of apps. Search for **Google Docs** and click it.
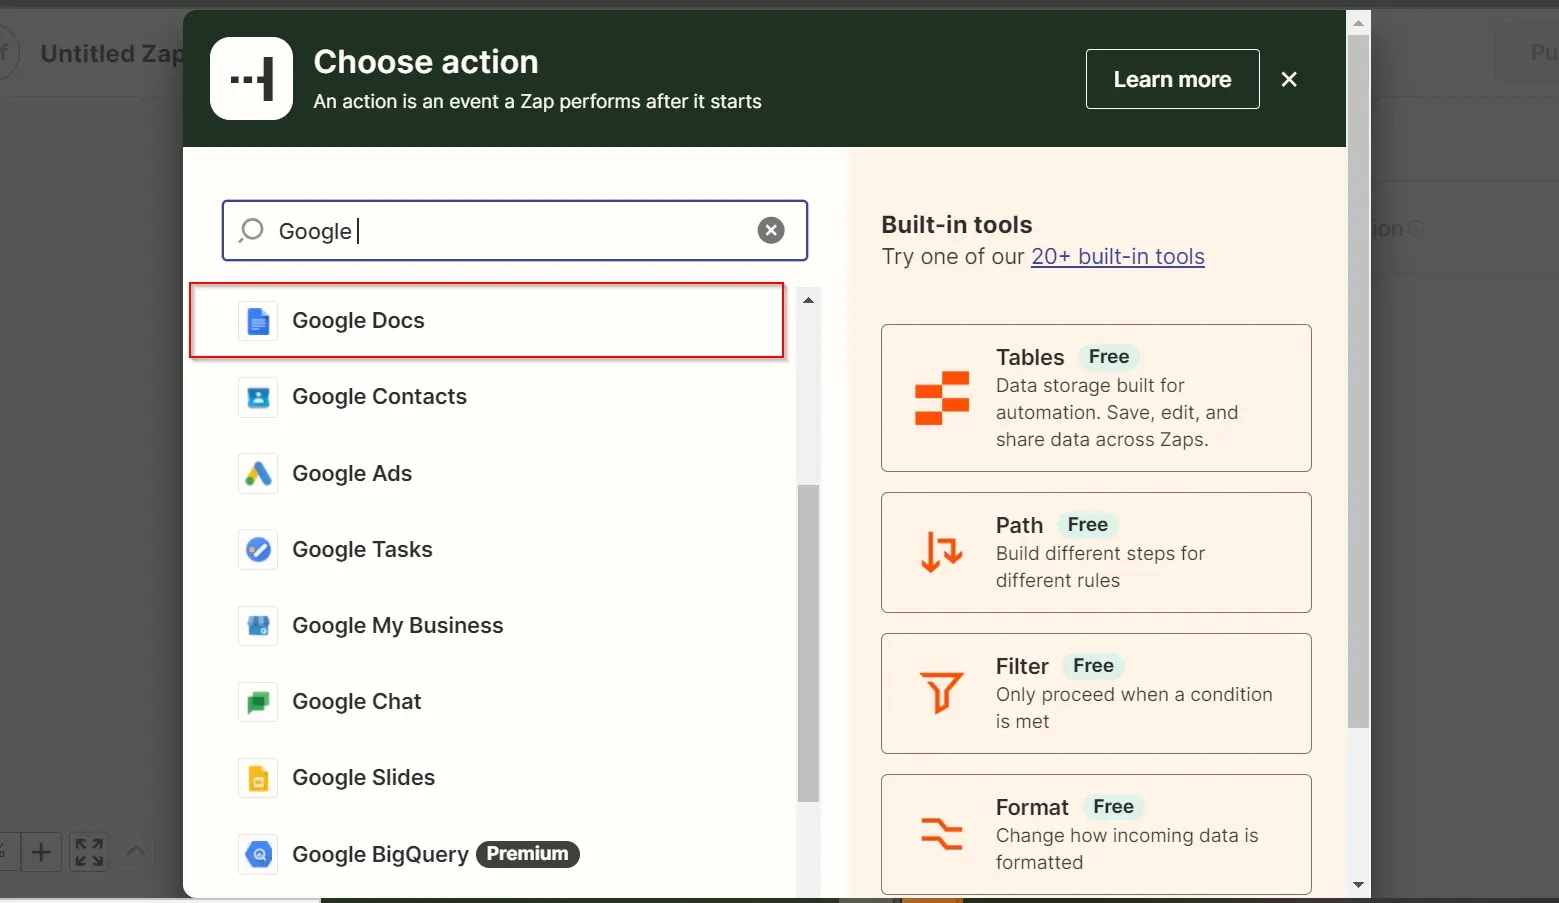 2. Click the **Event** field, select **Append Text to Document**, then click **Continue**.
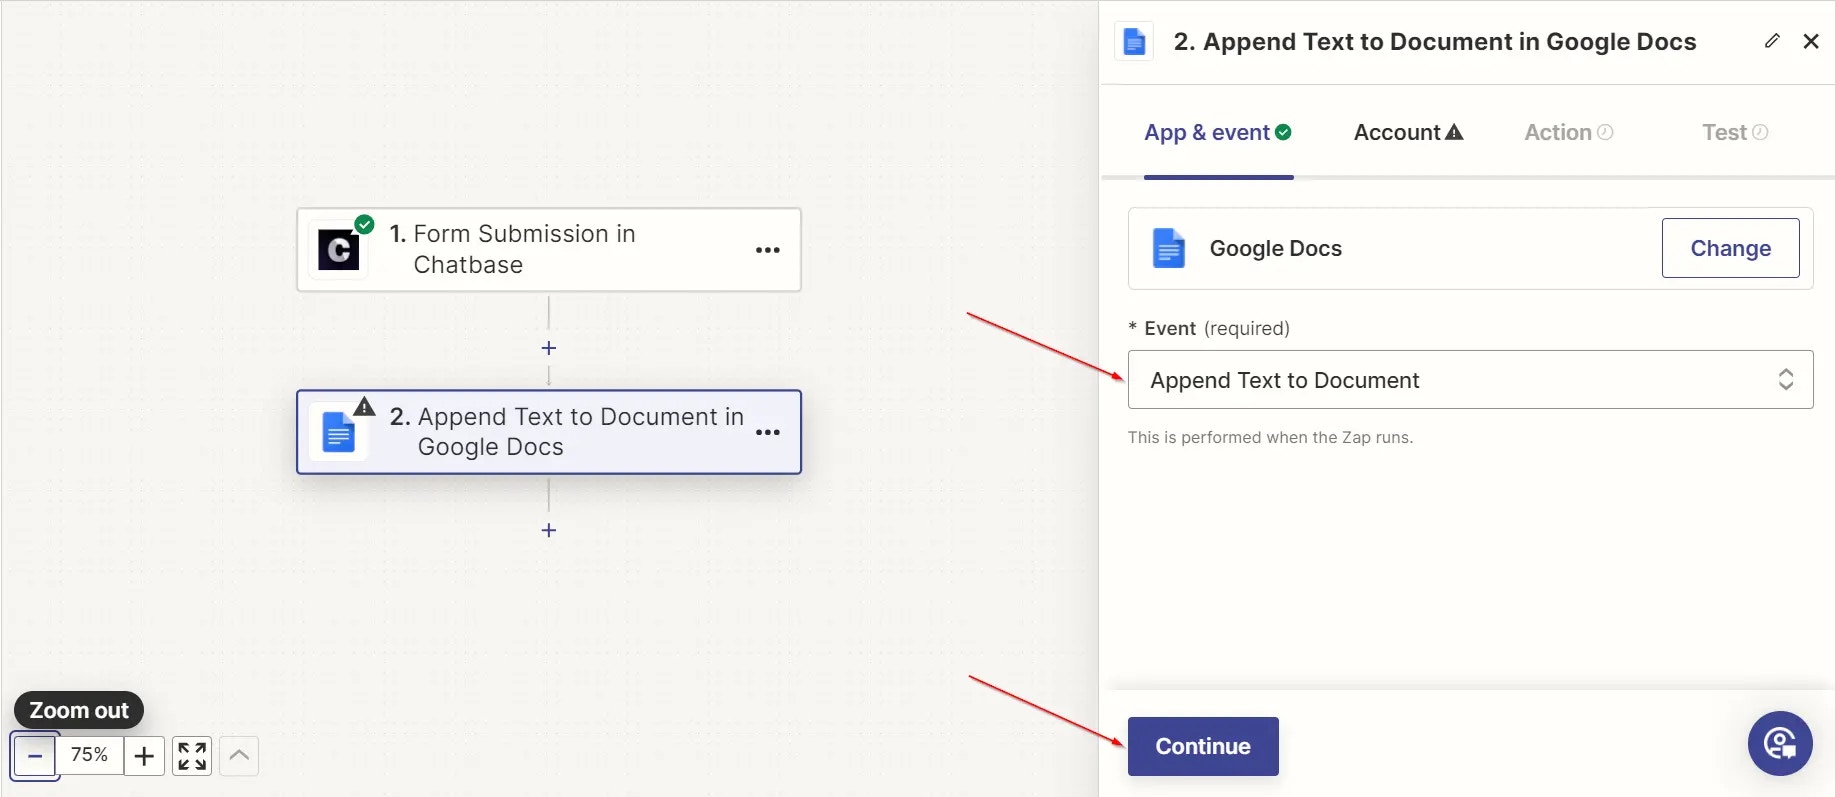 3. Sign into your Google account and click **Continue**.
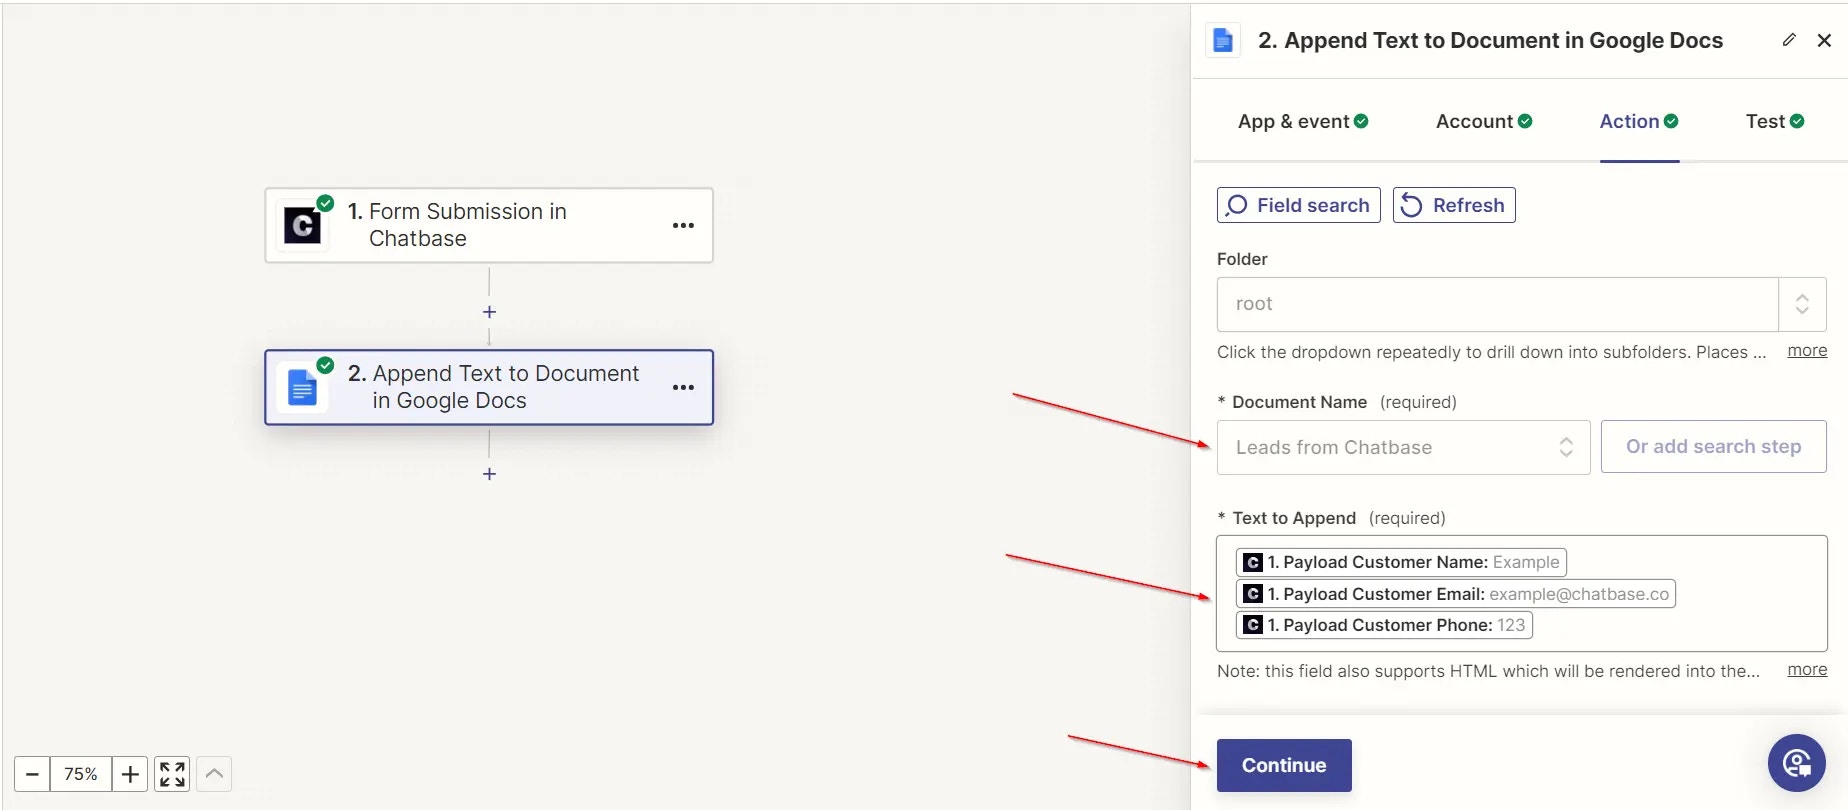
4. Select the document you wish to append to, in the **Document Name** field.
5. In the **Text to Append** field, select the lead form field you want to add, then click **Continue**.
3. Sign into your Google account and click **Continue**.
4. Select the document you wish to append to, in the **Document Name** field.
5. In the **Text to Append** field, select the lead form field you want to add, then click **Continue**.
 Click to test the setup, then click **Publish** to go live.
Trigger a lead capture on your site and confirm the lead is appended to your target Google Docs file.
## Next steps
Configure which details your AI agent captures, and when.
An alternative no-code automation platform, connected through webhooks.
Click to test the setup, then click **Publish** to go live.
Trigger a lead capture on your site and confirm the lead is appended to your target Google Docs file.
## Next steps
Configure which details your AI agent captures, and when.
An alternative no-code automation platform, connected through webhooks.